How to Set Up and Upload a VRChat Avatar in Unity (Complete Beginner Guide)
A complete step-by-step guide to setting up and uploading your first VRChat avatar in Unity, from installing VCC to hitting Build and Publish.

Please note: this is mainly a PC upload guide. The Quest/Meta process is very similar but has some key differences. I'll be covering that in a separate guide soon. It’s not rocket science, even if it feels like it at first.
If you've just bought your first avatar and have no idea what to do next, this guide is for you. Getting an avatar into VRChat isn't just drag-and-drop. There's a specific setup process in Unity, and if you skip steps or install the wrong things, it won't work. I've been through this pipeline multiple times and I'm going to walk you through exactly what to do.
My first upload was a nightmare. Genuinely stressful, genuinely annoying, and I had no idea what I was doing (shoutout to Noelia, she helped me immensely). I own 180 avatars and have uploaded 164 of them, so at this point I've been through this pipeline more times than I can count. I made this guide because I have the free time, I love this community, and nobody should have to figure this out the hard way.
This is everything I wish someone had told me the first time. ♡
What You'll Need Before You Start
- Unity 2022.3.22f1: this is the version VRChat currently requires. Don't use a newer or older version.
- VRChat Creator Companion (VCC): this is how you create and manage your avatar projects. Download it at vrchat.com/home/download.
- Your avatar files: usually a .unitypackage file or a folder you got from Booth or another store.
Step 1: Make Sure Your VRChat Account is Verified
Before you can upload anything, your VRChat account needs to be verified. If you signed up through Steam, Meta, or another platform login, you may not have a VRChat email and password set yet, and you'll need one to log into the SDK inside Unity. Its ok if none of this makes sense yet, just keep reading ^_^
To fix this:
- Go to vrchat.com and log in through whatever method you used.
- Go to your account settings and add an email address and create a password.
Verify your email when the confirmation arrives.
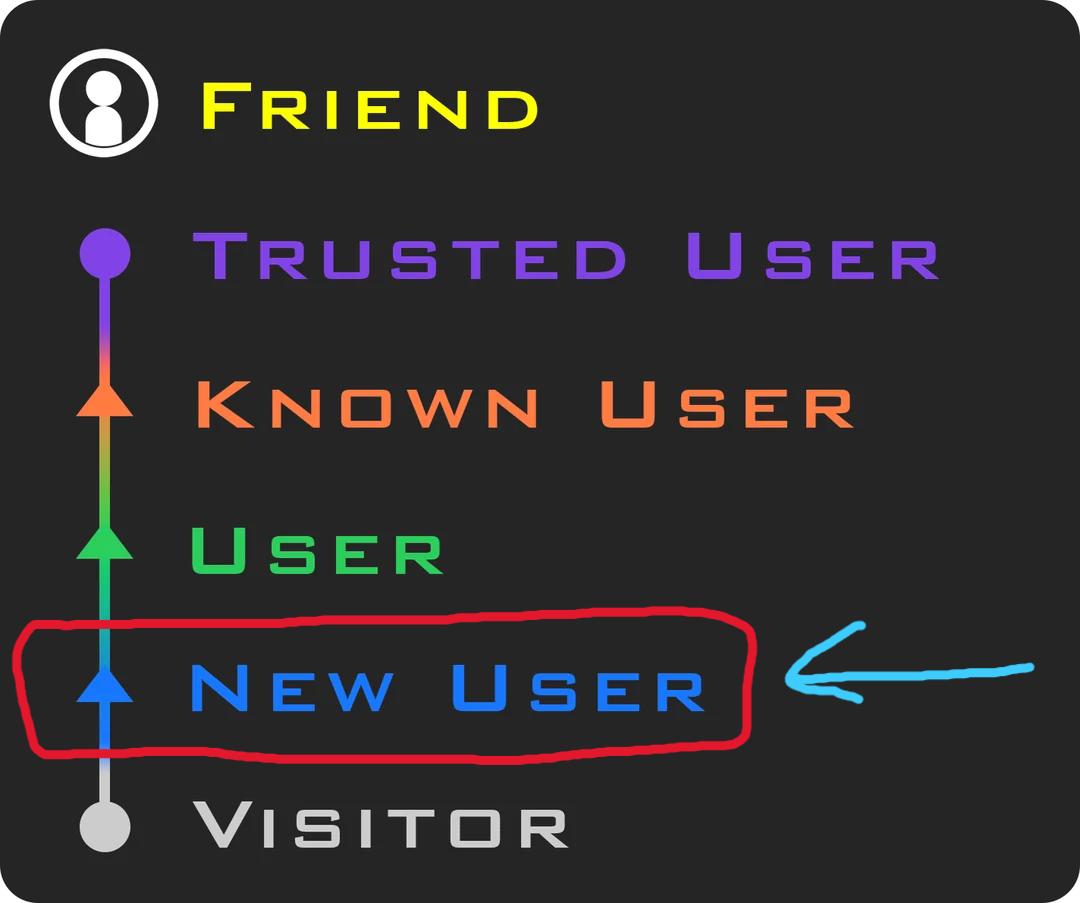
You also need to earn Trust Rank: New User before you can upload avatars. This takes around 20 hours of in-game time across VRChat worlds. If you want to skip the wait, you can sign up with a Steam account or a standalone VRChat email account instead of a platform login. Either of those methods grants upload access much faster.
Step 2: Install Creator Companion Unity 2022.3.22f1
First, download and install VRChat Creator Companion (VCC) from vrchat.com/home/download if you haven't already. VCC manages your Unity projects and packages, and you'll need it before anything else.
You need a specific version of Unity for VRChat. Don't just install the latest one.
Option A: Through VCC Open VCC, go to Settings, and under Unity Editors click Find or Install. VCC should detect or install the correct version automatically.
Option B: Direct download (more reliable) Go to the Unity download archive and install it manually. This is what I did the first time.
After installing, open VCC and make sure it detects your Unity installation under Settings > Unity Editors. If it doesn't, click Find and point it to the folder where you installed Unity.
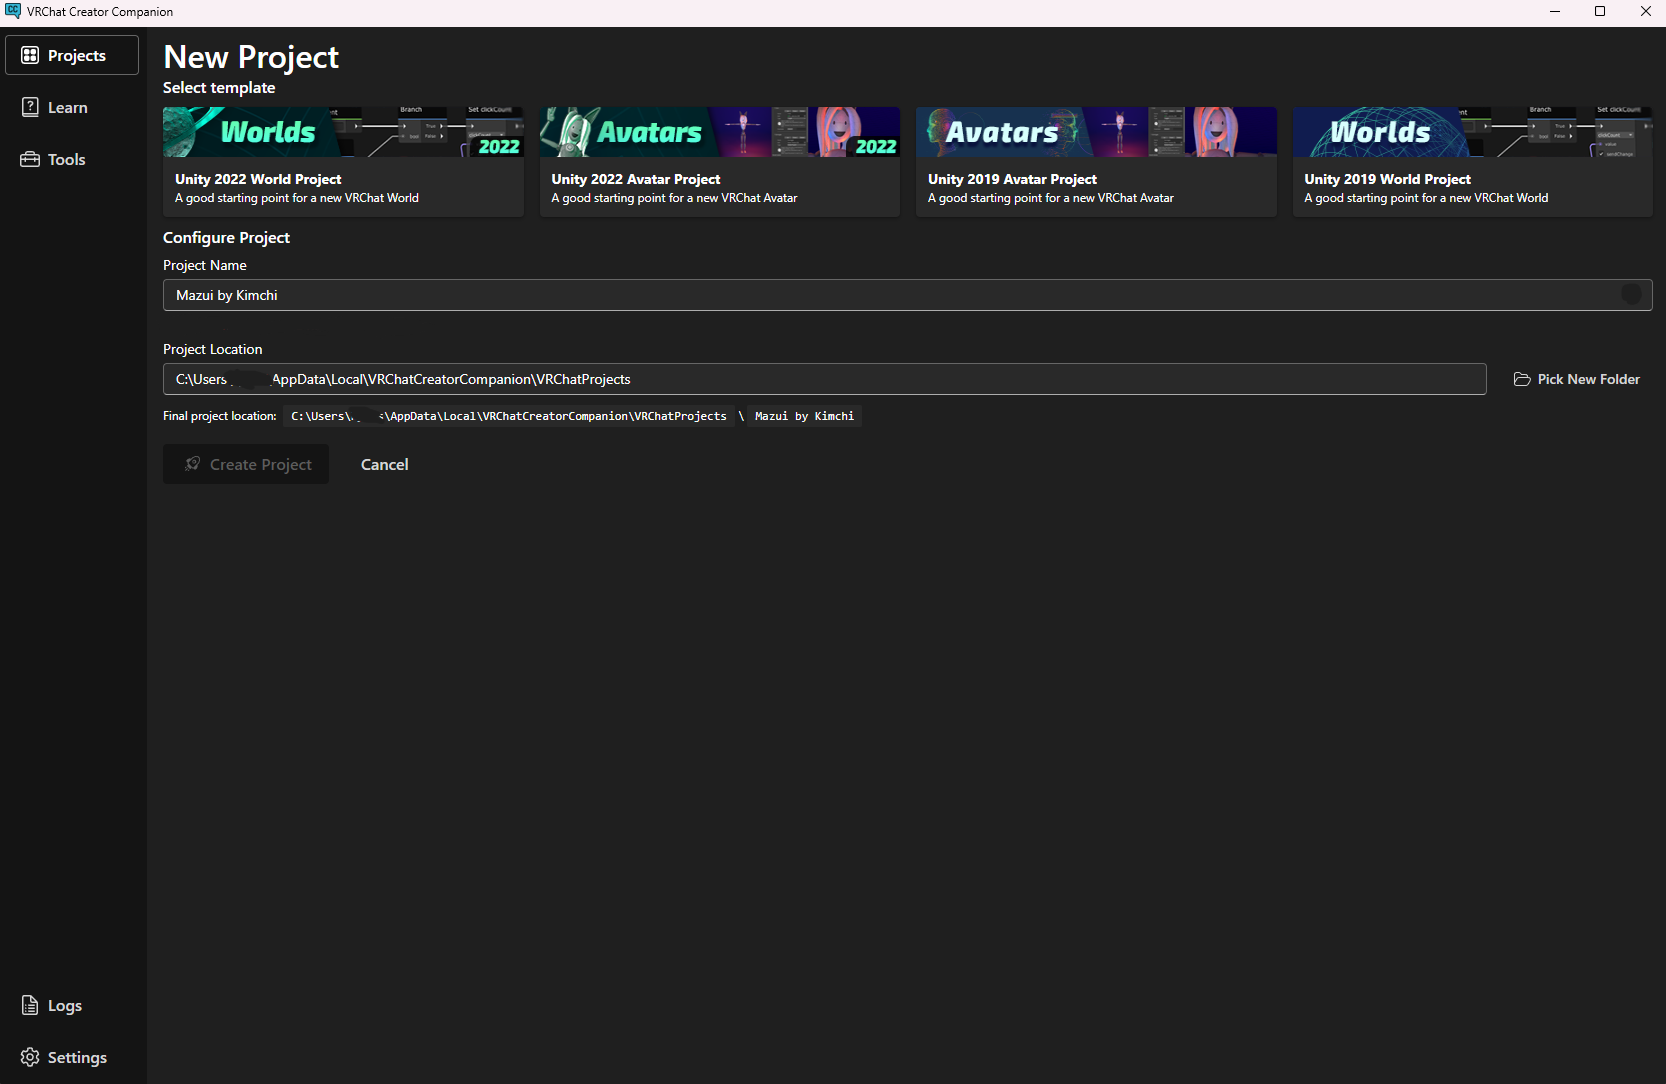
Step 3: Create a New Avatar Project
- In VCC, click Create New Project.
- Select Avatar 2022 as the project type. Most modern avatars use this. Some older bases may specify 2019 in their instructions, so always check the creator's documentation first.
- Name your project. I name mine after the avatar, like "Imogen by Lil Nic."
- Click Create Project.
- Before opening, add any repositories you need through VCC. This is where you add package sources like VRCFury or other tools.
- Most avatar packages will ask you to add repositories before opening the project. At minimum you'll almost always need VRCFury (use the latest version unless the creator specifies otherwise). Many packages also require Poiyomi Toon, which is the most common avatar shader in VRChat. GoGoLoco and face tracking packages are common too depending on the avatar. lilToon comes up less often but is popular with Booth bases. If you do need it, I recommend the .unitypackage download over the repo as it's more stable and doesn't depend on the repo staying connected. Repositories can sometimes need to be reset and reimported when things break, so I try not to add more than the avatar actually requires. Always check your creator's documentation for the exact list.
- GoGoLoco should be added here if your avatar requires it or if you want locomotion controls like sitting, laying down, and flying. Some avatar creators include it automatically, some don't. Check your creator's documentation.
- Most creators will include a limited copy of Poiyomi Pro with their avatar package, so you may not need to source it yourself. If they don't, Poiyomi Pro is worth buying for $10 on Patreon.
- Use the latest version of VRChat SDK unless the avatar creator specifically tells you otherwise.
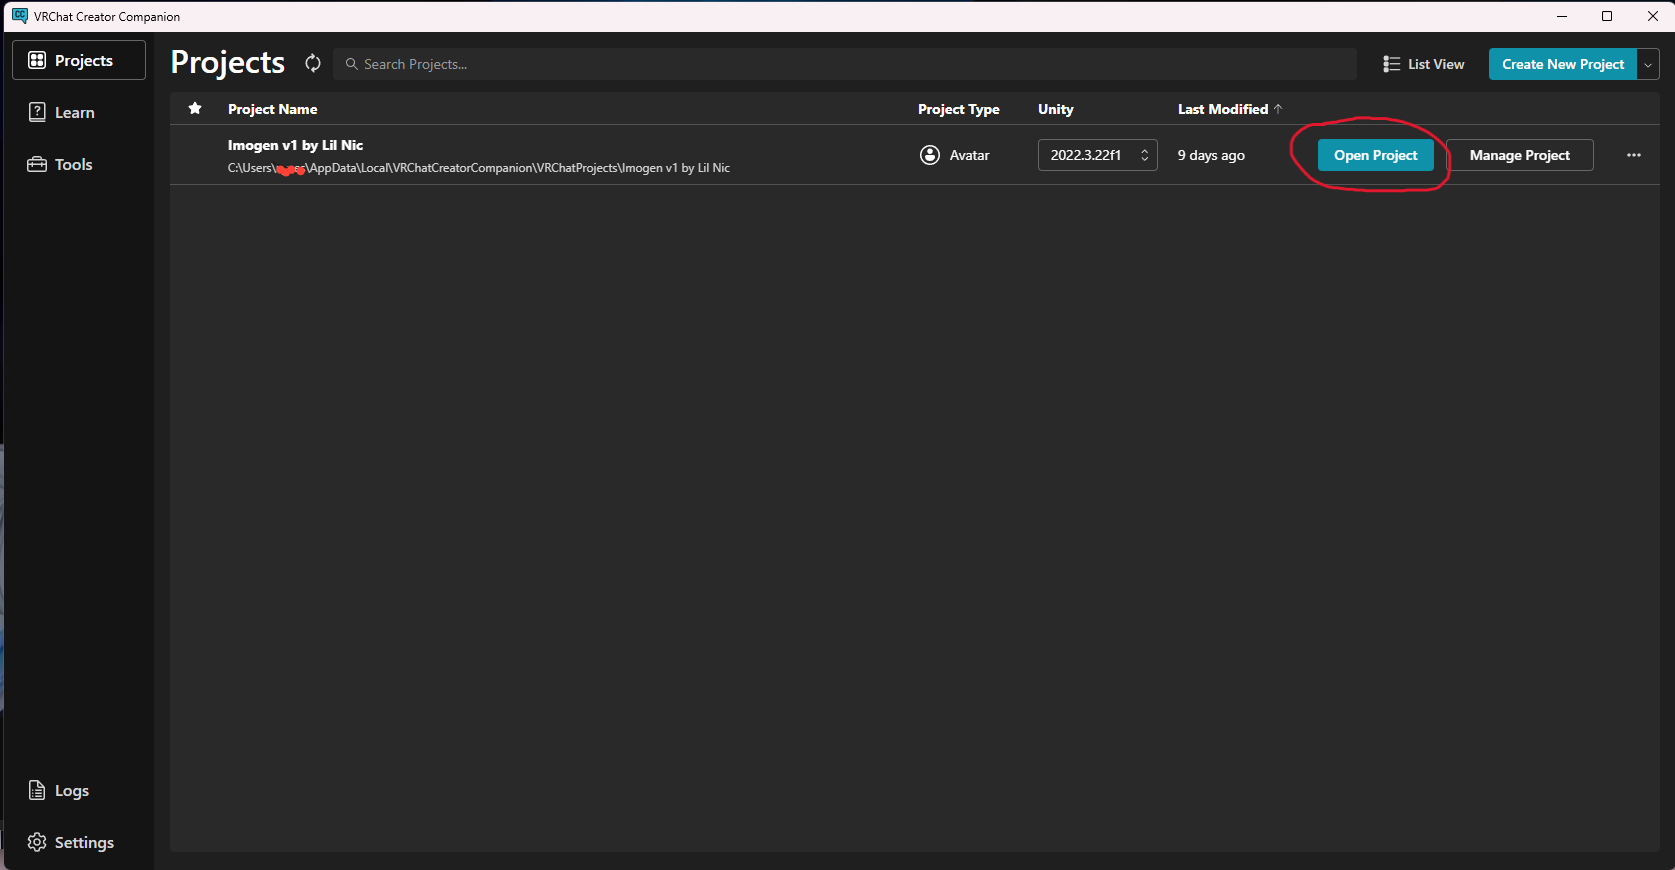
- Once your repositories are added, click Open Project. Unity will launch.
Links to starter repositories for Creator Companion:
Links to the full Unity packages (download, not a repository):
Step 4: Import Your Avatar
Every avatar package is a little different. Some creators include everything you need: pre-configured scenes, materials already set up, even a read-me with clear instructions. Others drop you a folder with loose files and no guidance. I'll cover the most common variations throughout this guide, but if your package looks different from what I describe, that's normal. The core steps are the same.
Import in this order:
- Shaders first. Drag in your shader packages (Poiyomi, lilToon, Crystal, or whatever the avatar requires). Each one will pop up an import window. Click Import.
- Any extra dependencies next. Some avatars need additional packages like PhysBones or other tools. Check the creator's documentation and import those before the avatar itself.
- Then import your avatar file. Drag the avatar .unitypackage into the Assets window. Click Import when the window pops up.
Always import shaders before the avatar file. If you do it the other way around, materials may not assign correctly and you'll end up with pink everywhere.


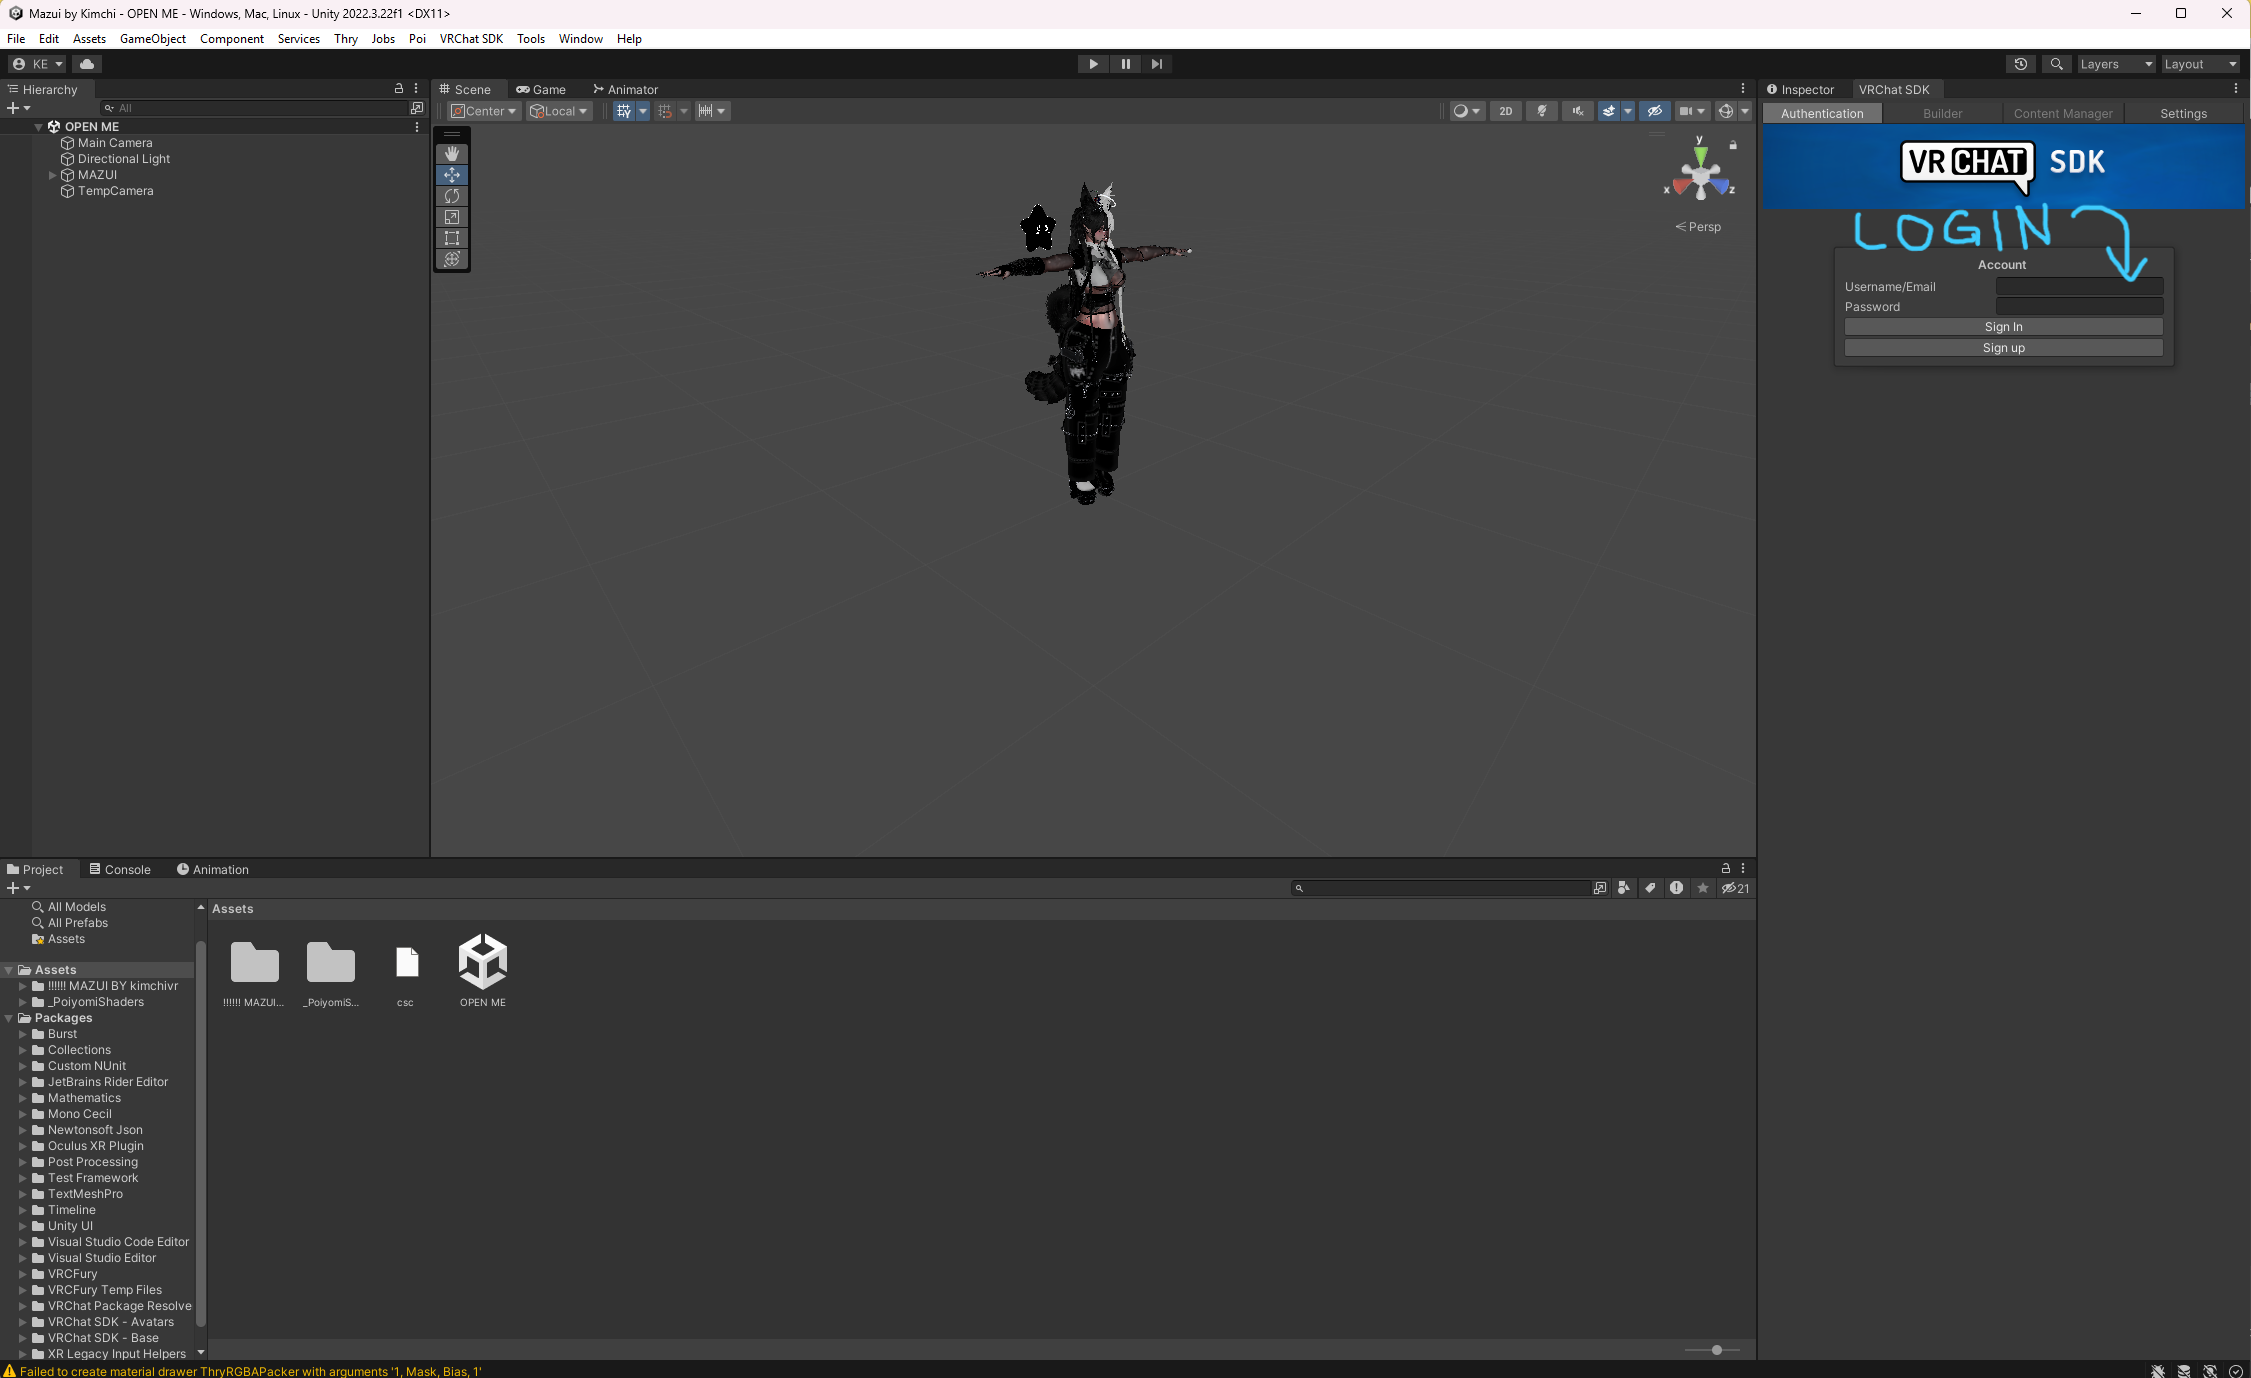
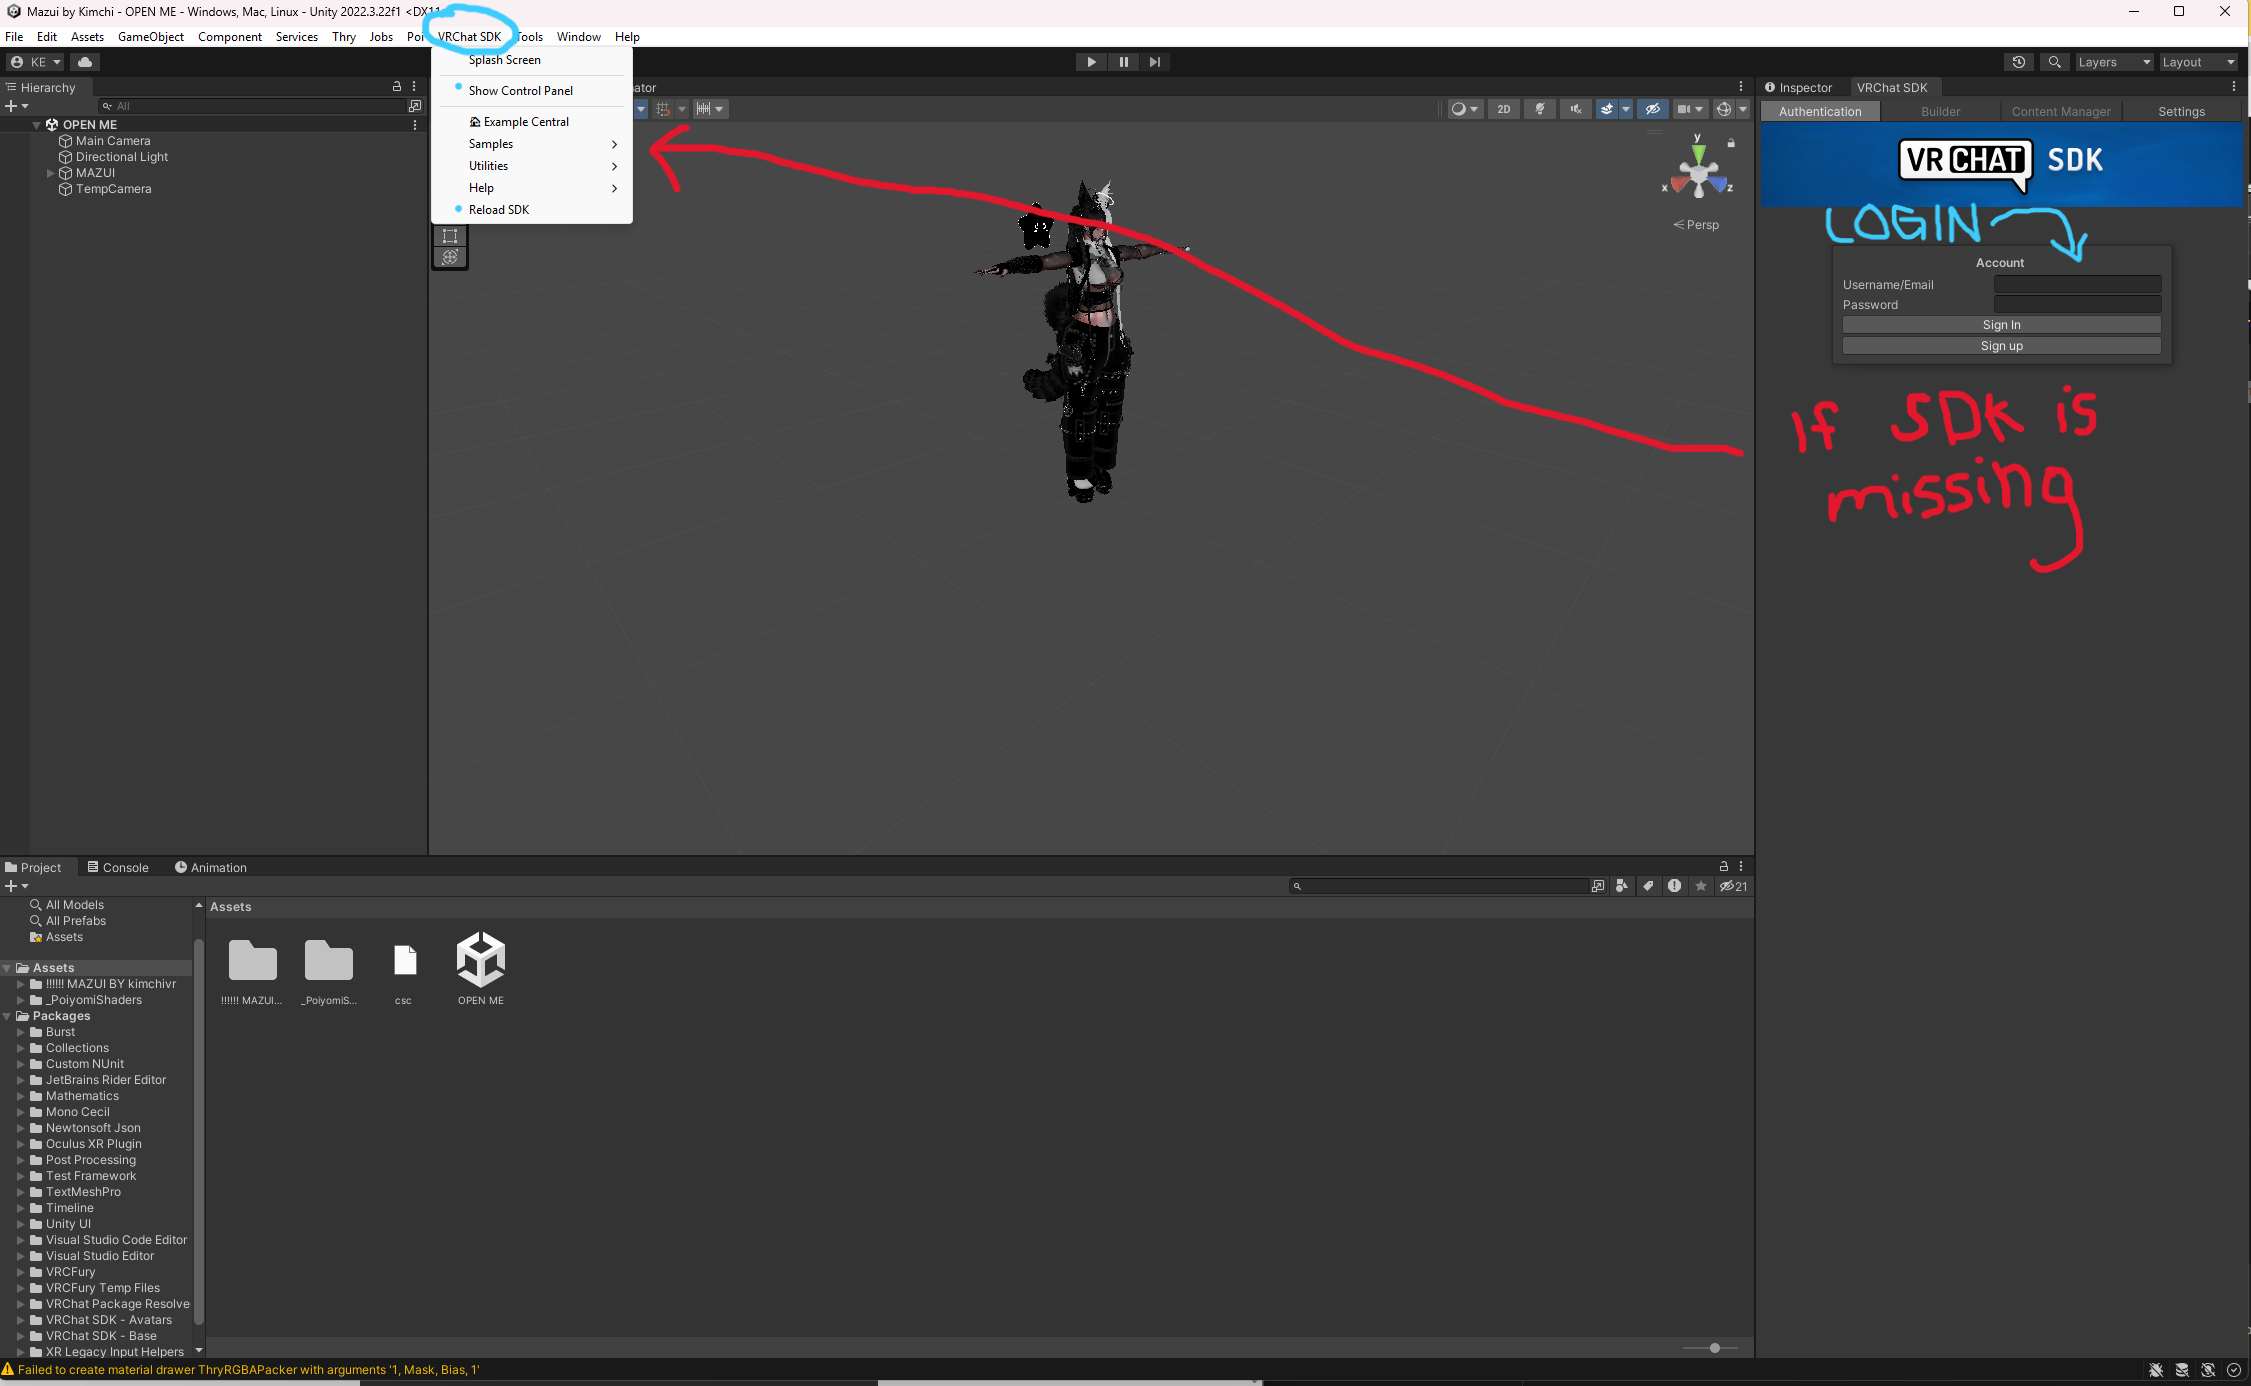
Step 5: Log Into the VRChat SDK
Before you go any further, log into the SDK panel inside Unity. You'll need to be signed in before you can upload anything, so better to do it now.
Go to VRChat SDK > Show Control Panel in the top menu. A panel will open the Authentication tab and sign in with your VRChat email and password.
If the SDK menu doesn't appear in your top menu bar, your VRChat packages aren't installed correctly. Go back to VCC, make sure the VRChat Base and Avatars packages are listed under your project, and reopen Unity.
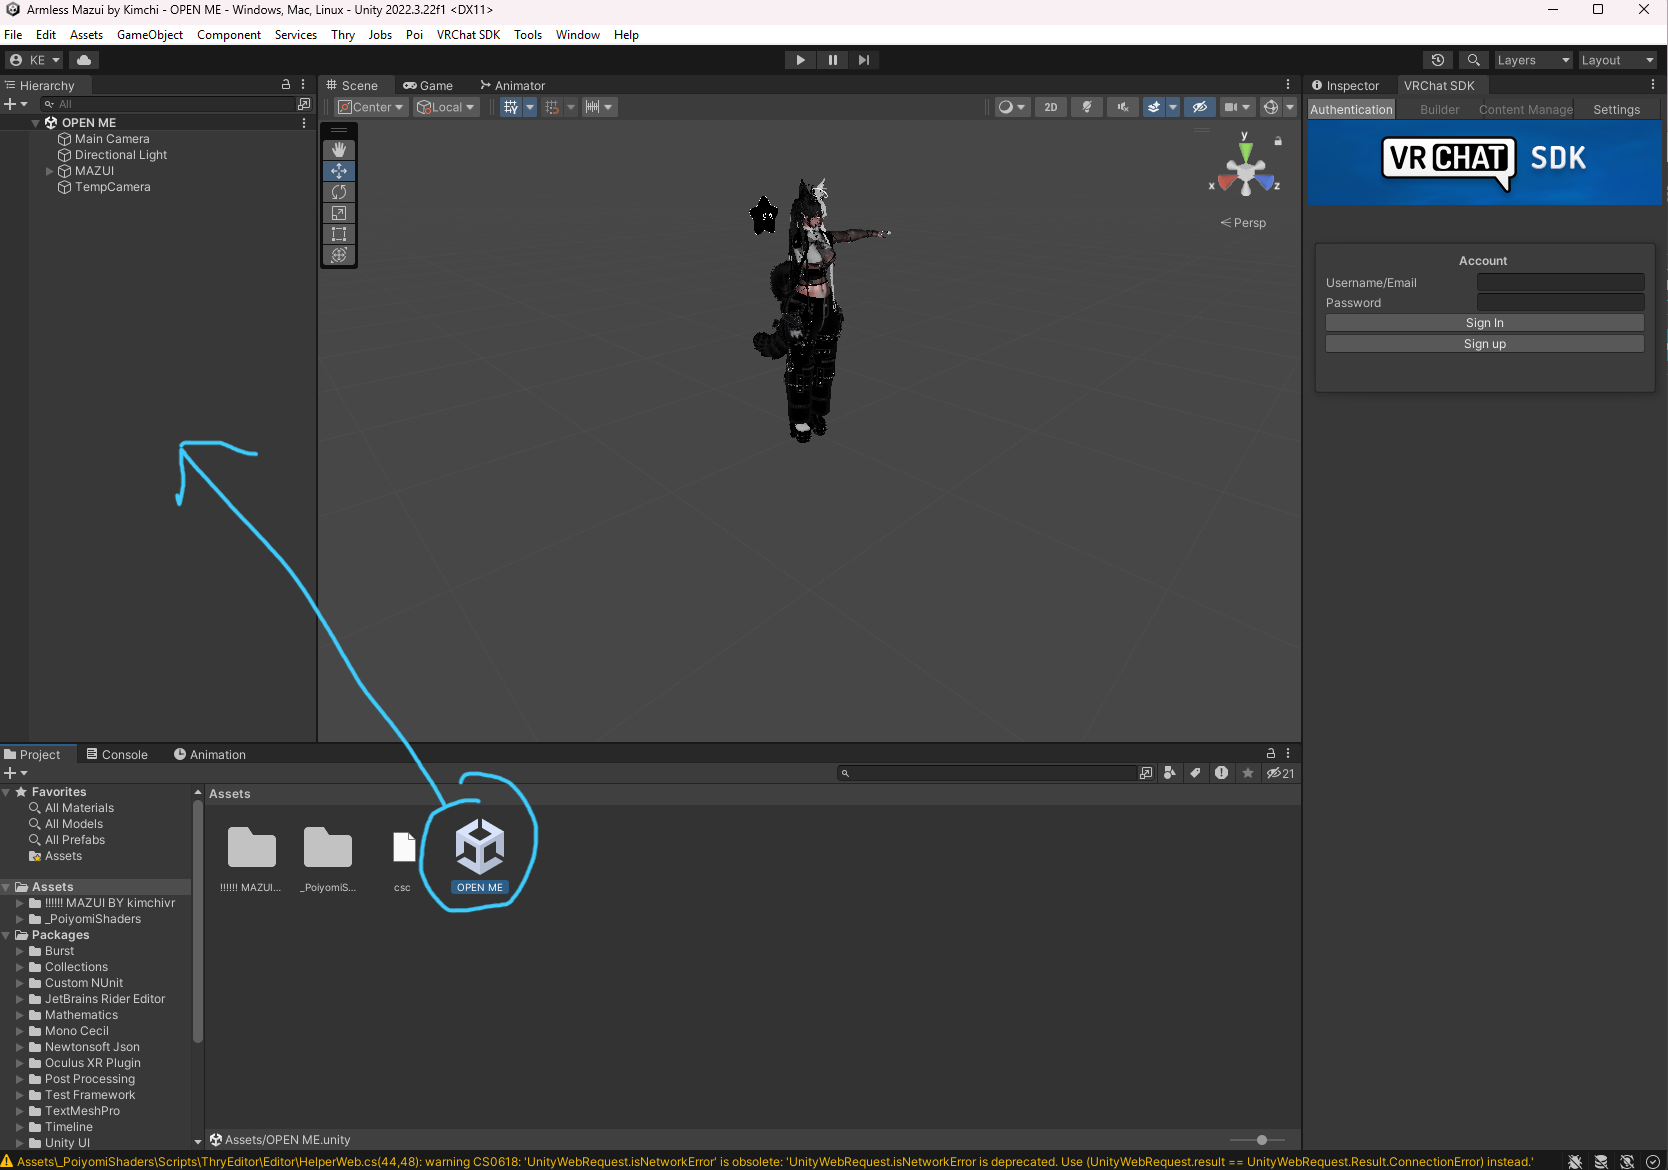
Step 6: Open the Avatar Scene
Most avatar packages include a pre-made scene file. The folder is usually called "OPEN ME" or named after the avatar. Find it in your Assets folder, open it, and double-click the scene file inside. Your avatar should appear in the Scene view automatically.
If there's no scene file, drag your avatar's prefab (the blue cube icon) into the Hierarchy panel instead.
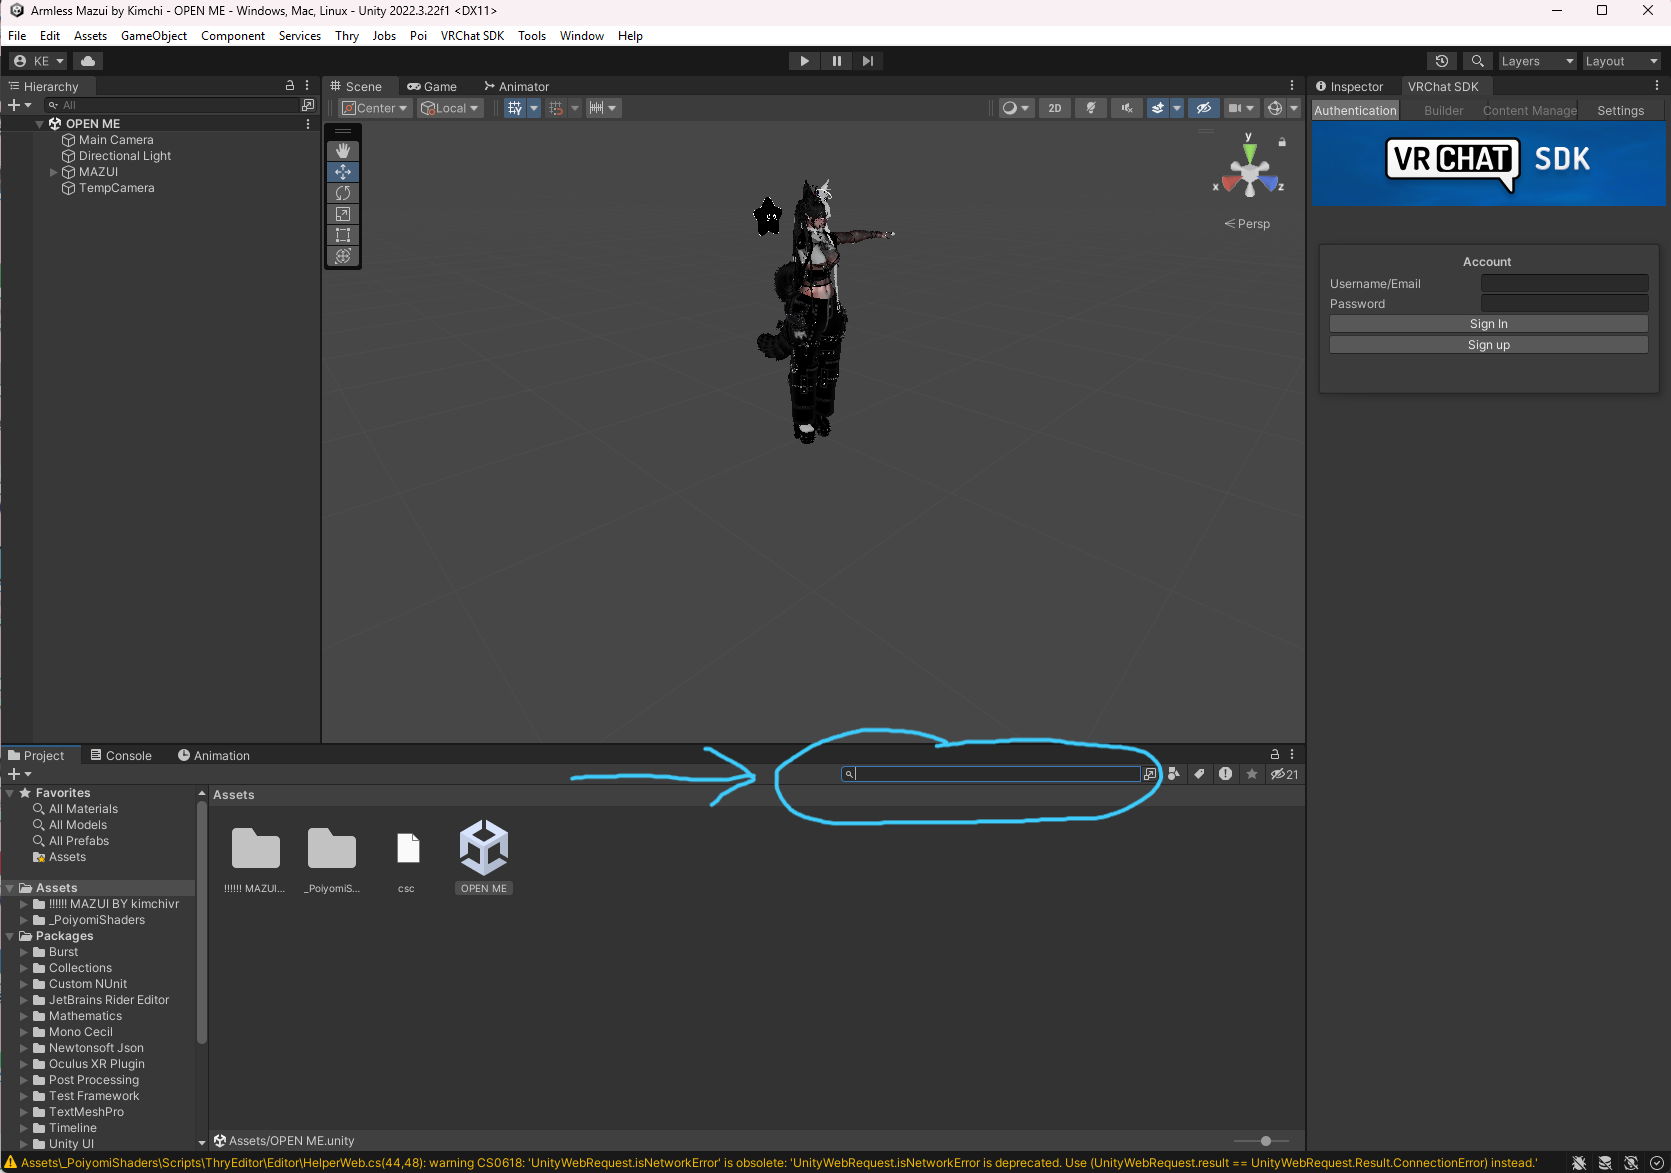
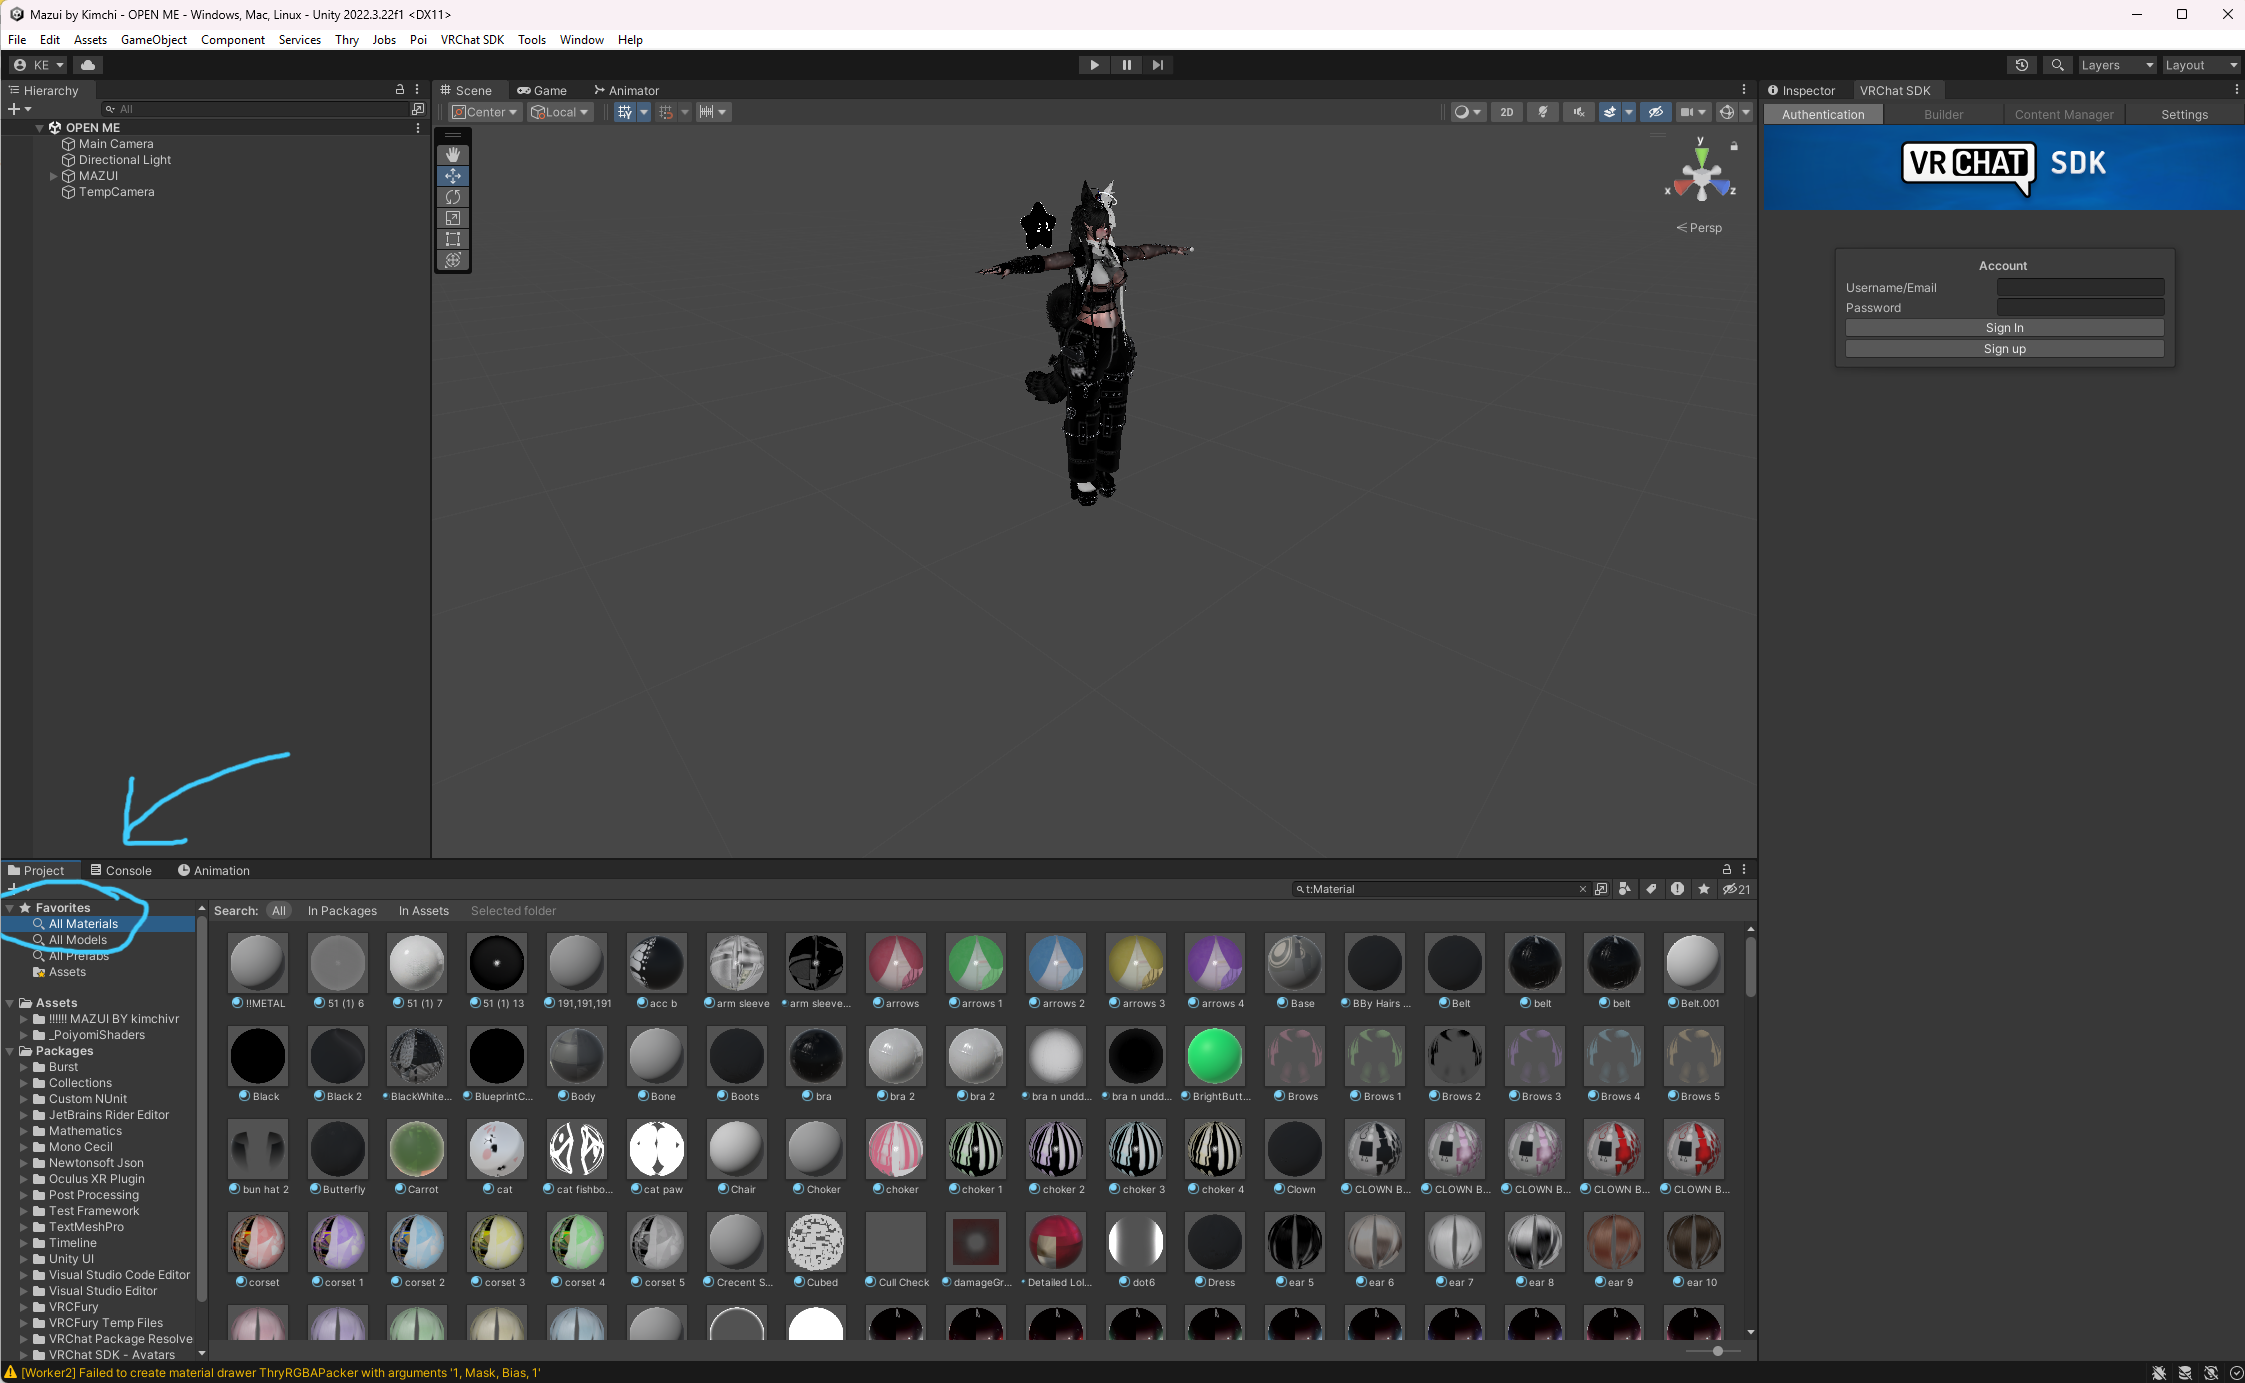
If you're having trouble finding the scene file, use the search bar at the top of the Project window. Type the avatar's name or "scene" and it will filter your Assets folder down to matching files.
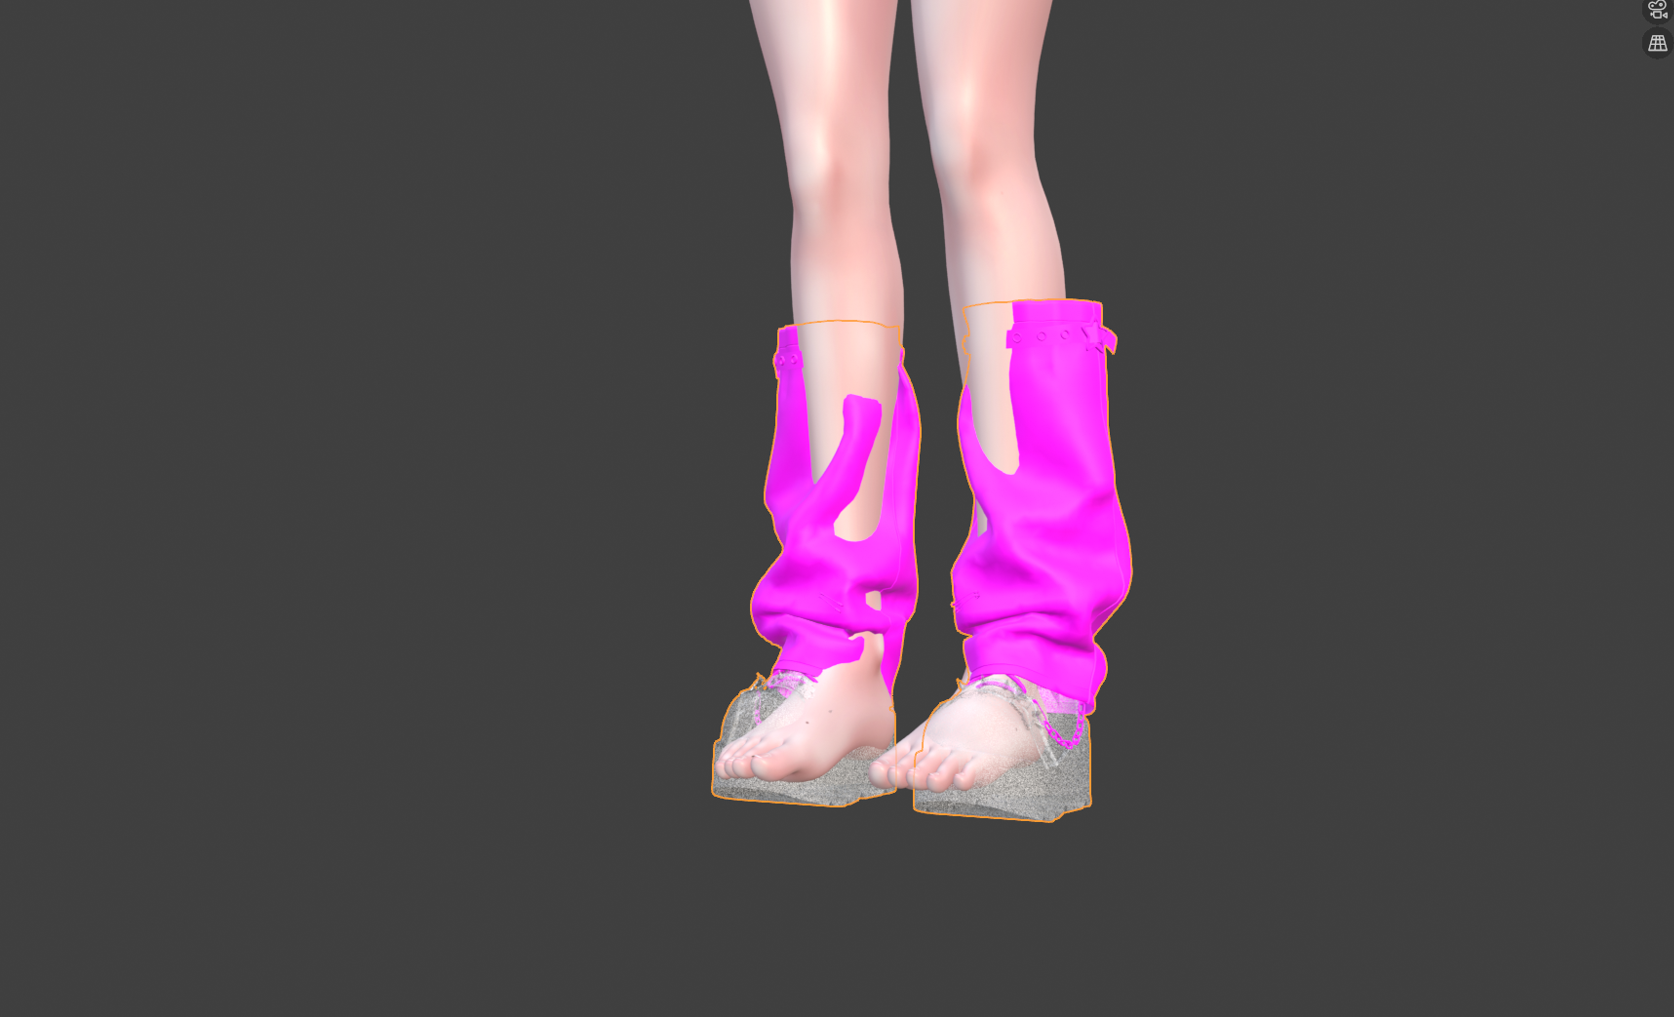
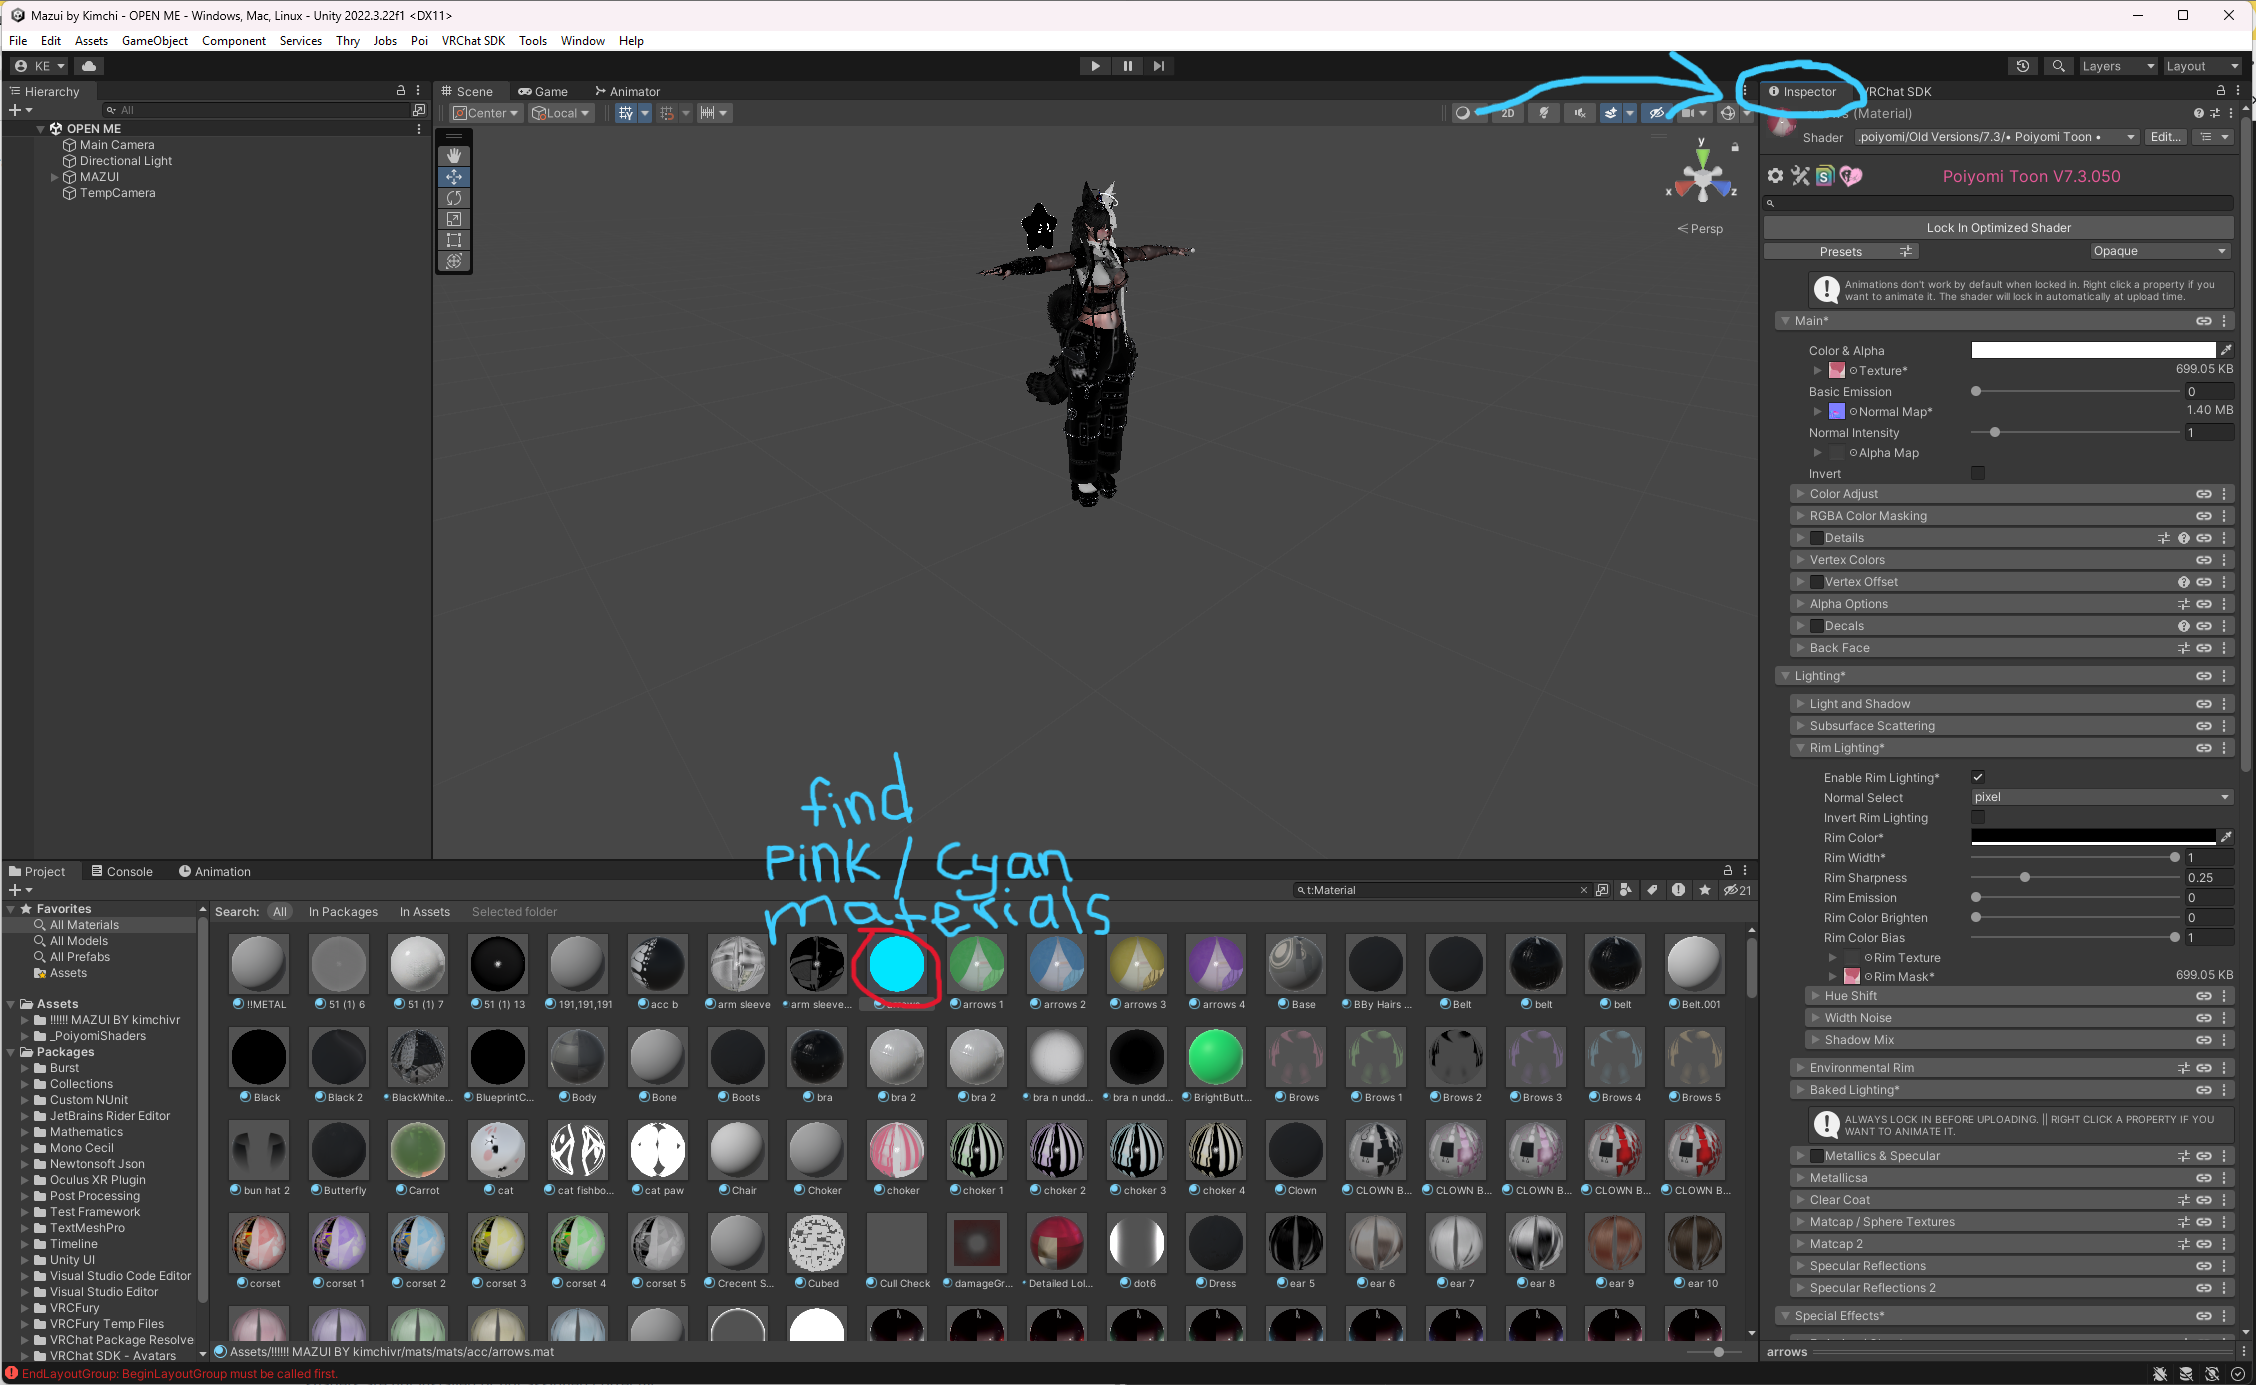
Step 7: Assign Materials and Shaders
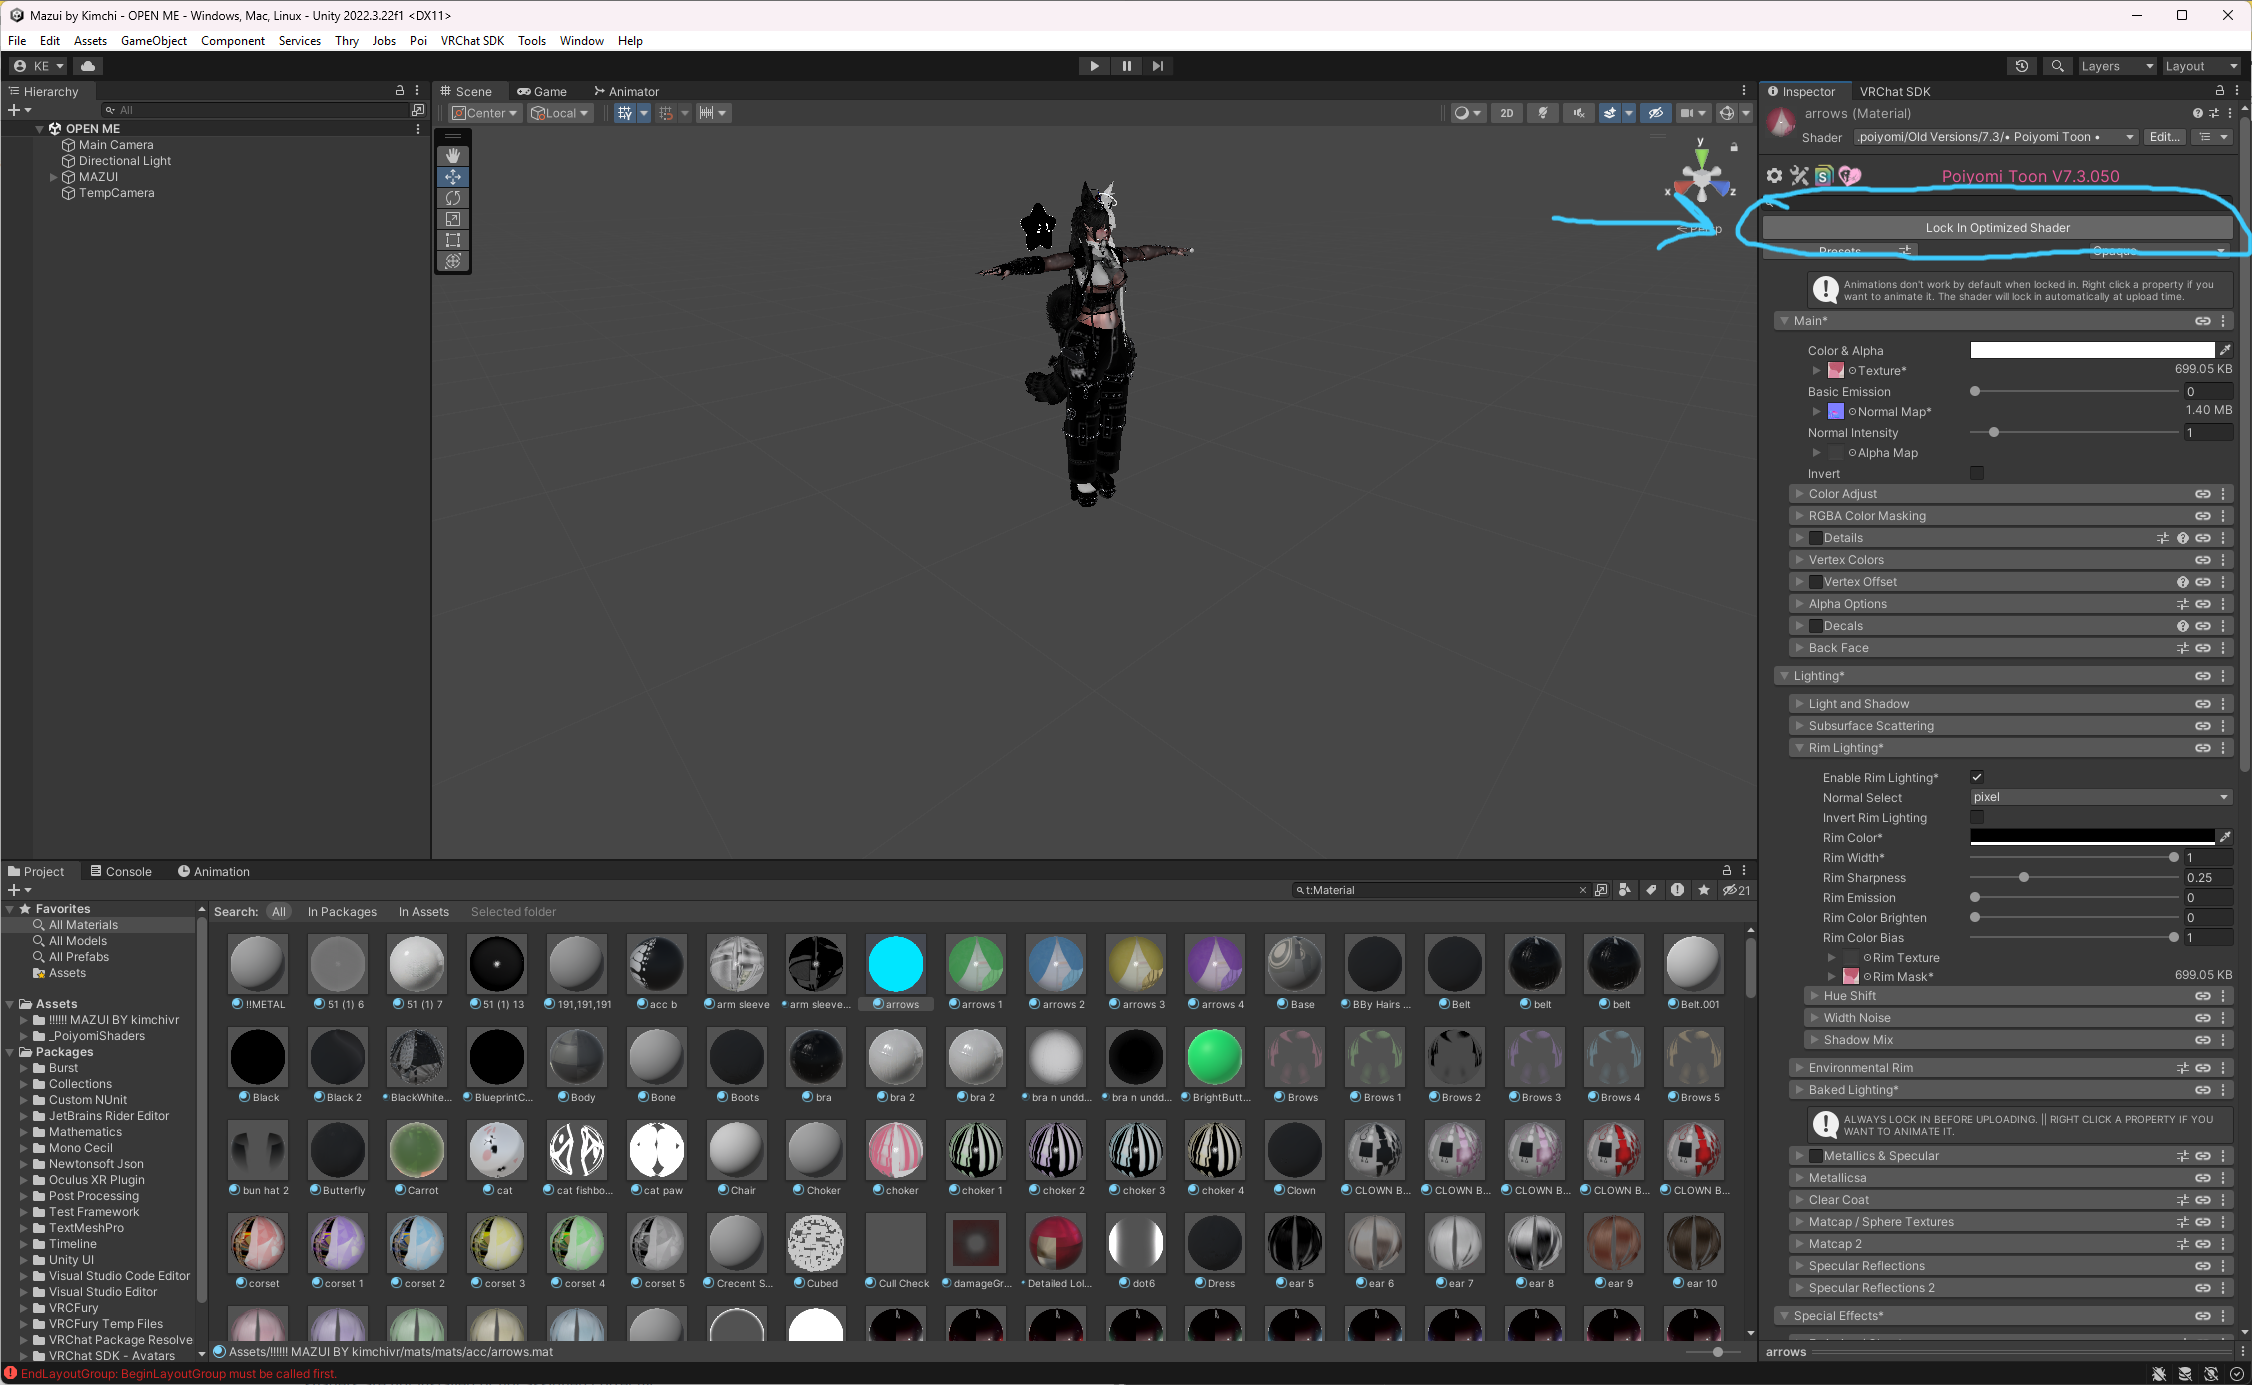
VRChat doesn't support all Unity shaders. If your avatar's materials show as pink or cyan in Unity, the shader isn't installed or isn't assigned correctly.
The most common shaders for VRChat avatars are Poiyomi Toon (for skin, hair, and clothing) and lilToon (great for accessories and simpler meshes).
To fix a pink material:
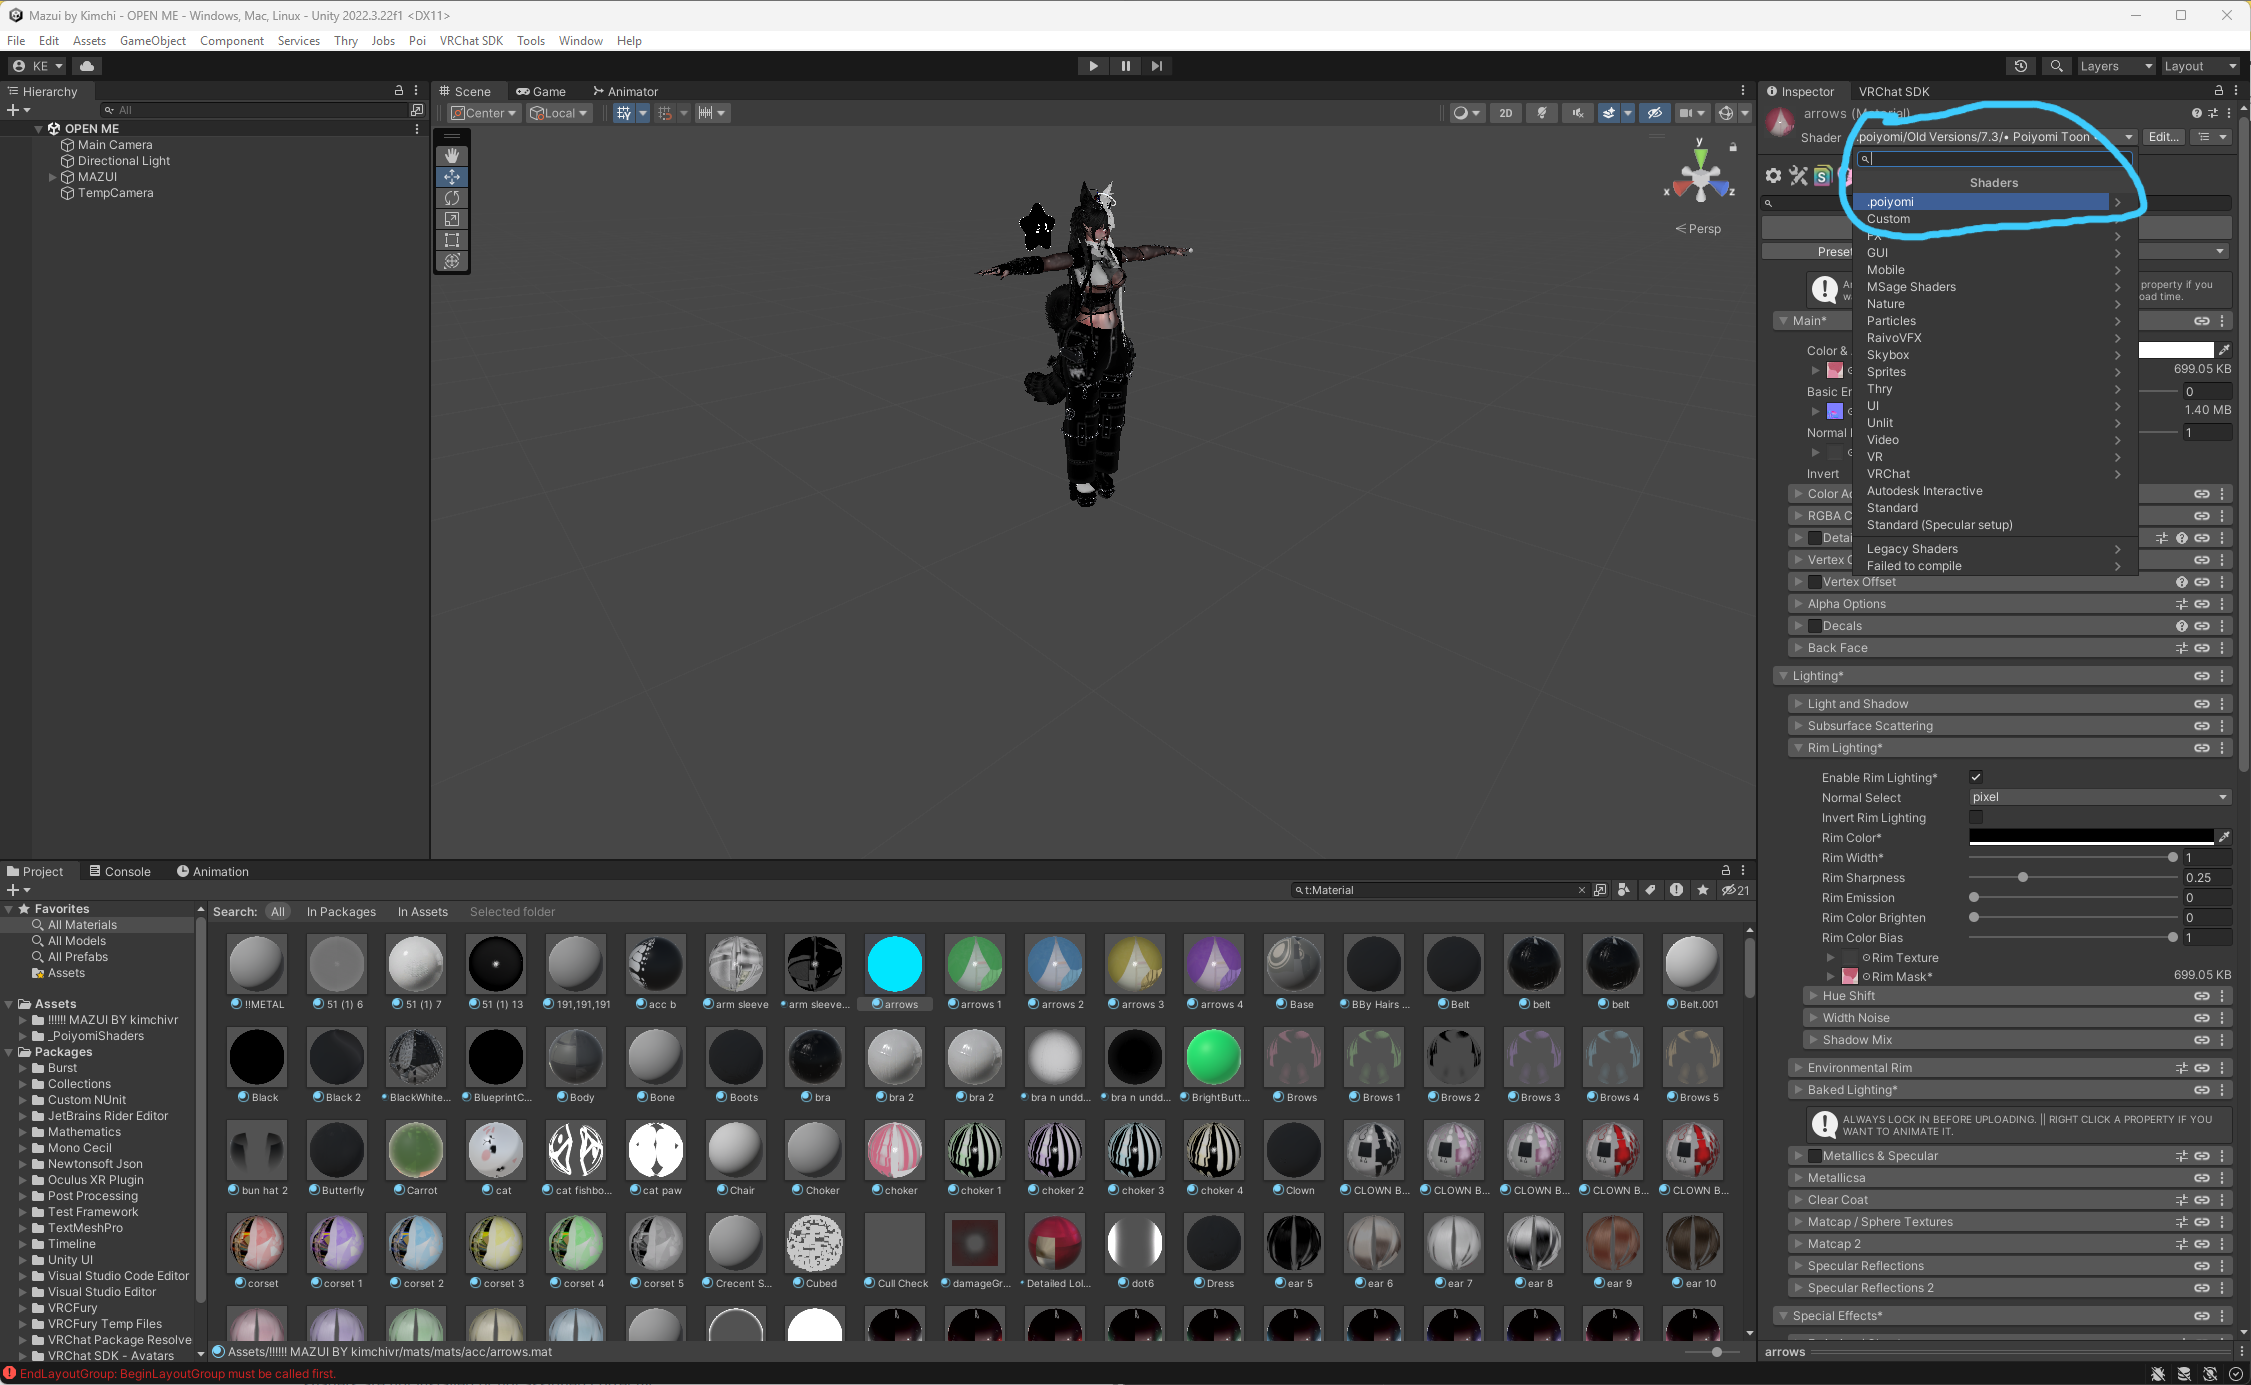
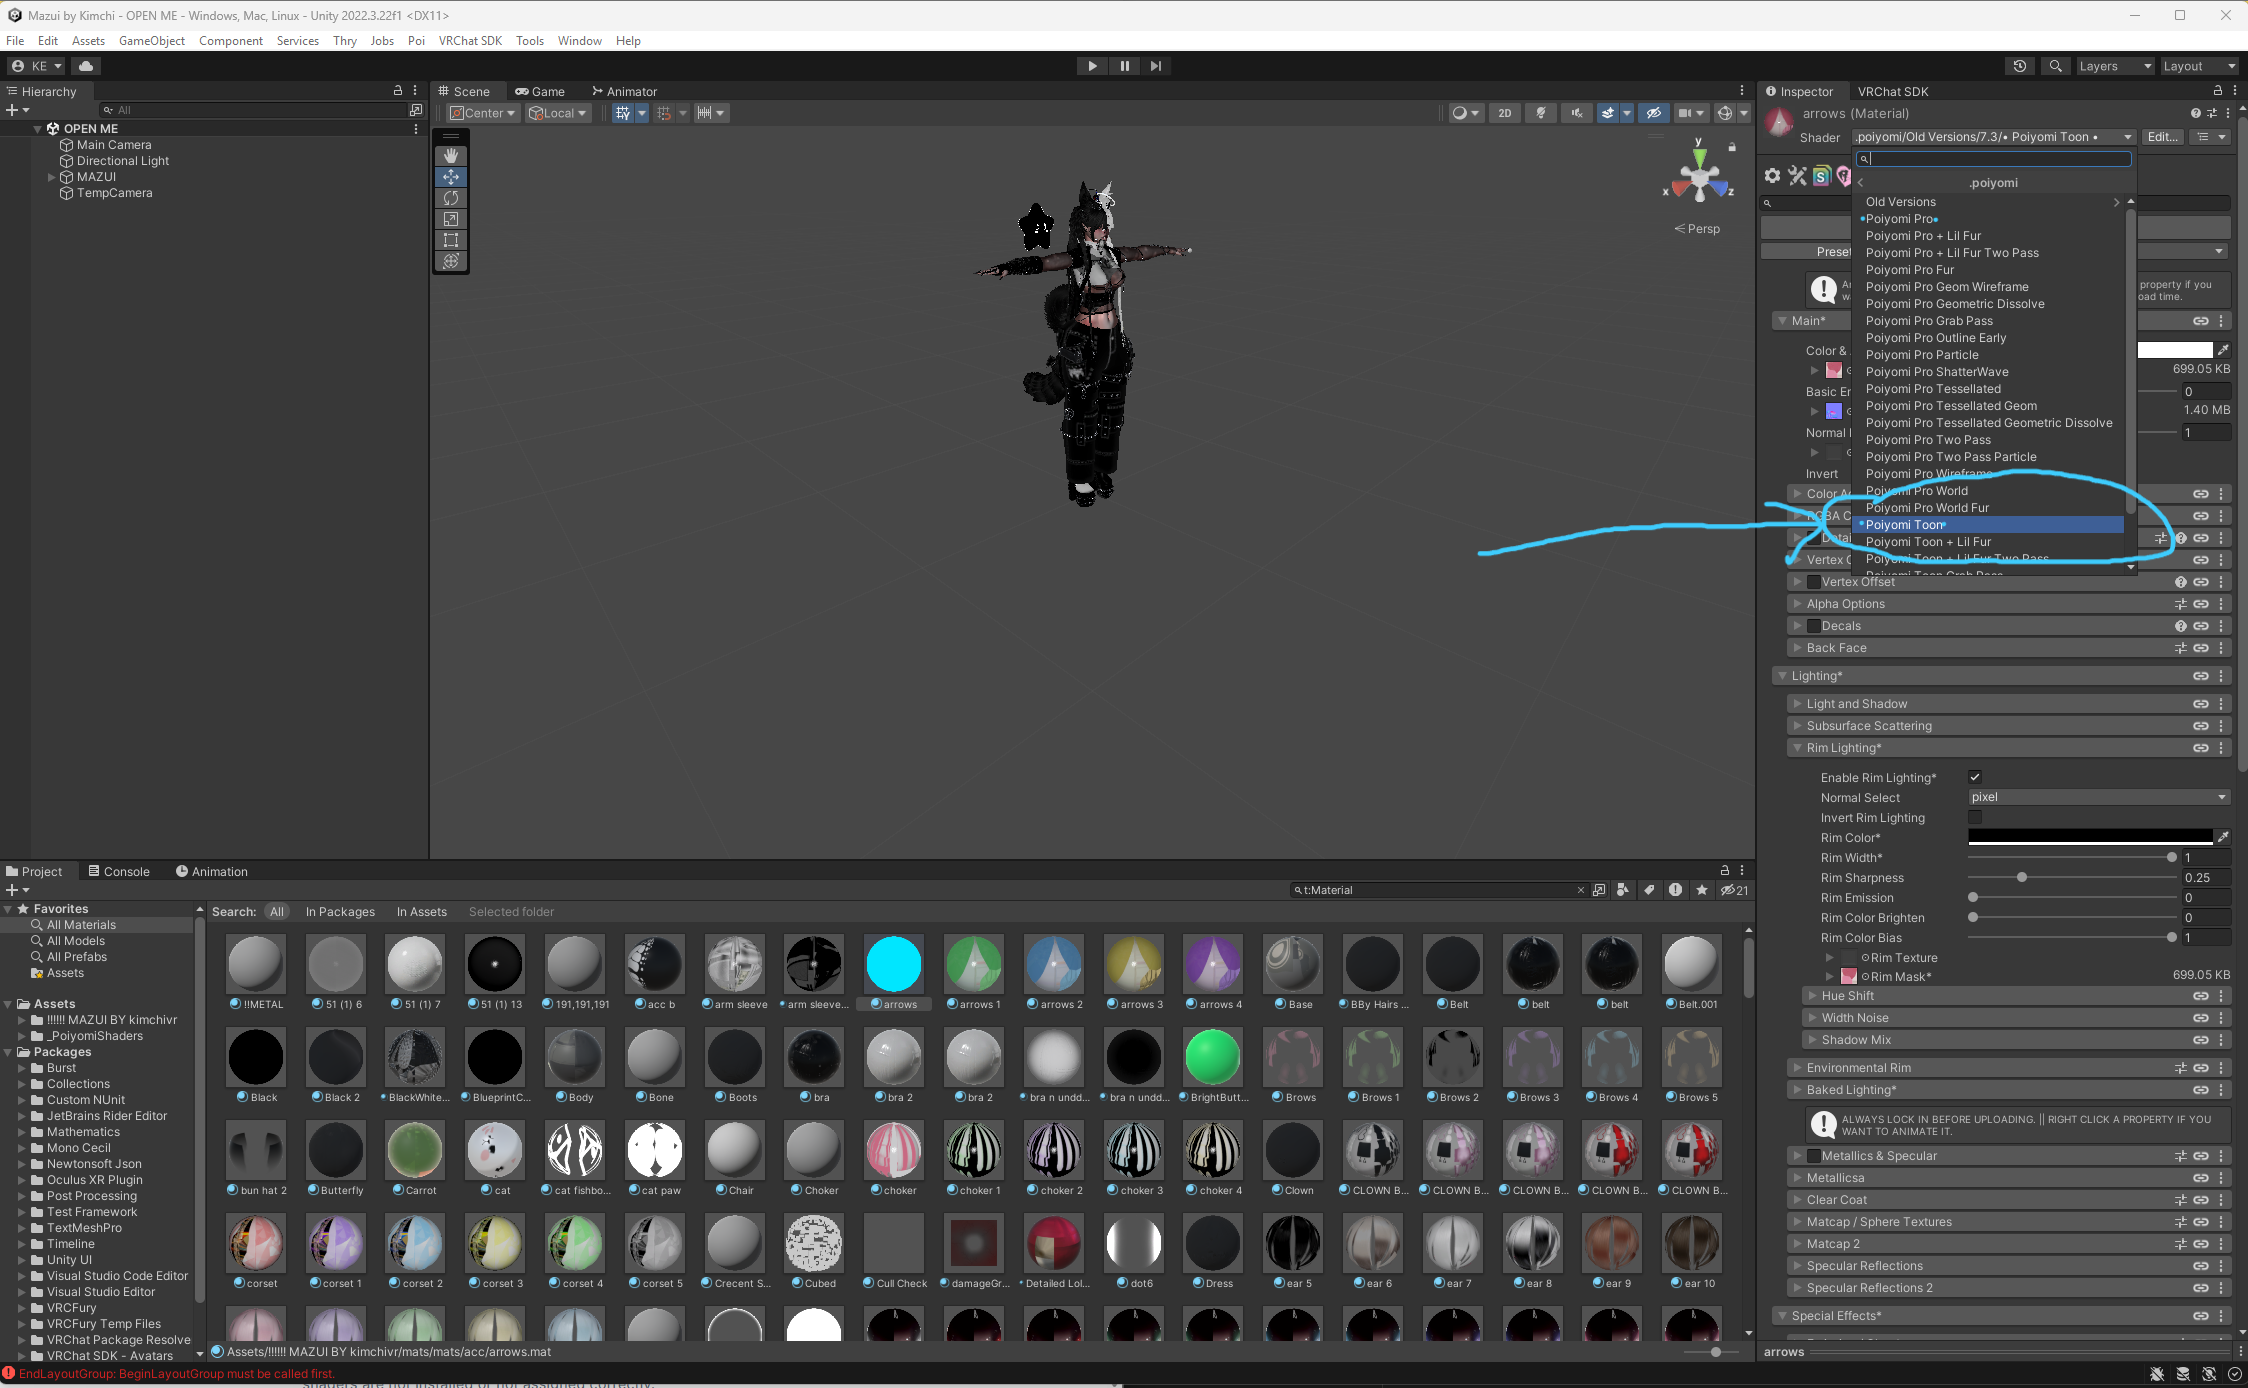
- Click the material in your Assets folder.
- In the Inspector, click the Shader dropdown at the top.
- Select your shader (Poiyomi, lilToon, etc.).
- Reassign any textures that got cleared.
Step 8: Build and Upload Your Avatar
This is a PC upload guide. If you're on Quest or Meta, the process is a little different and I'll cover that separately.
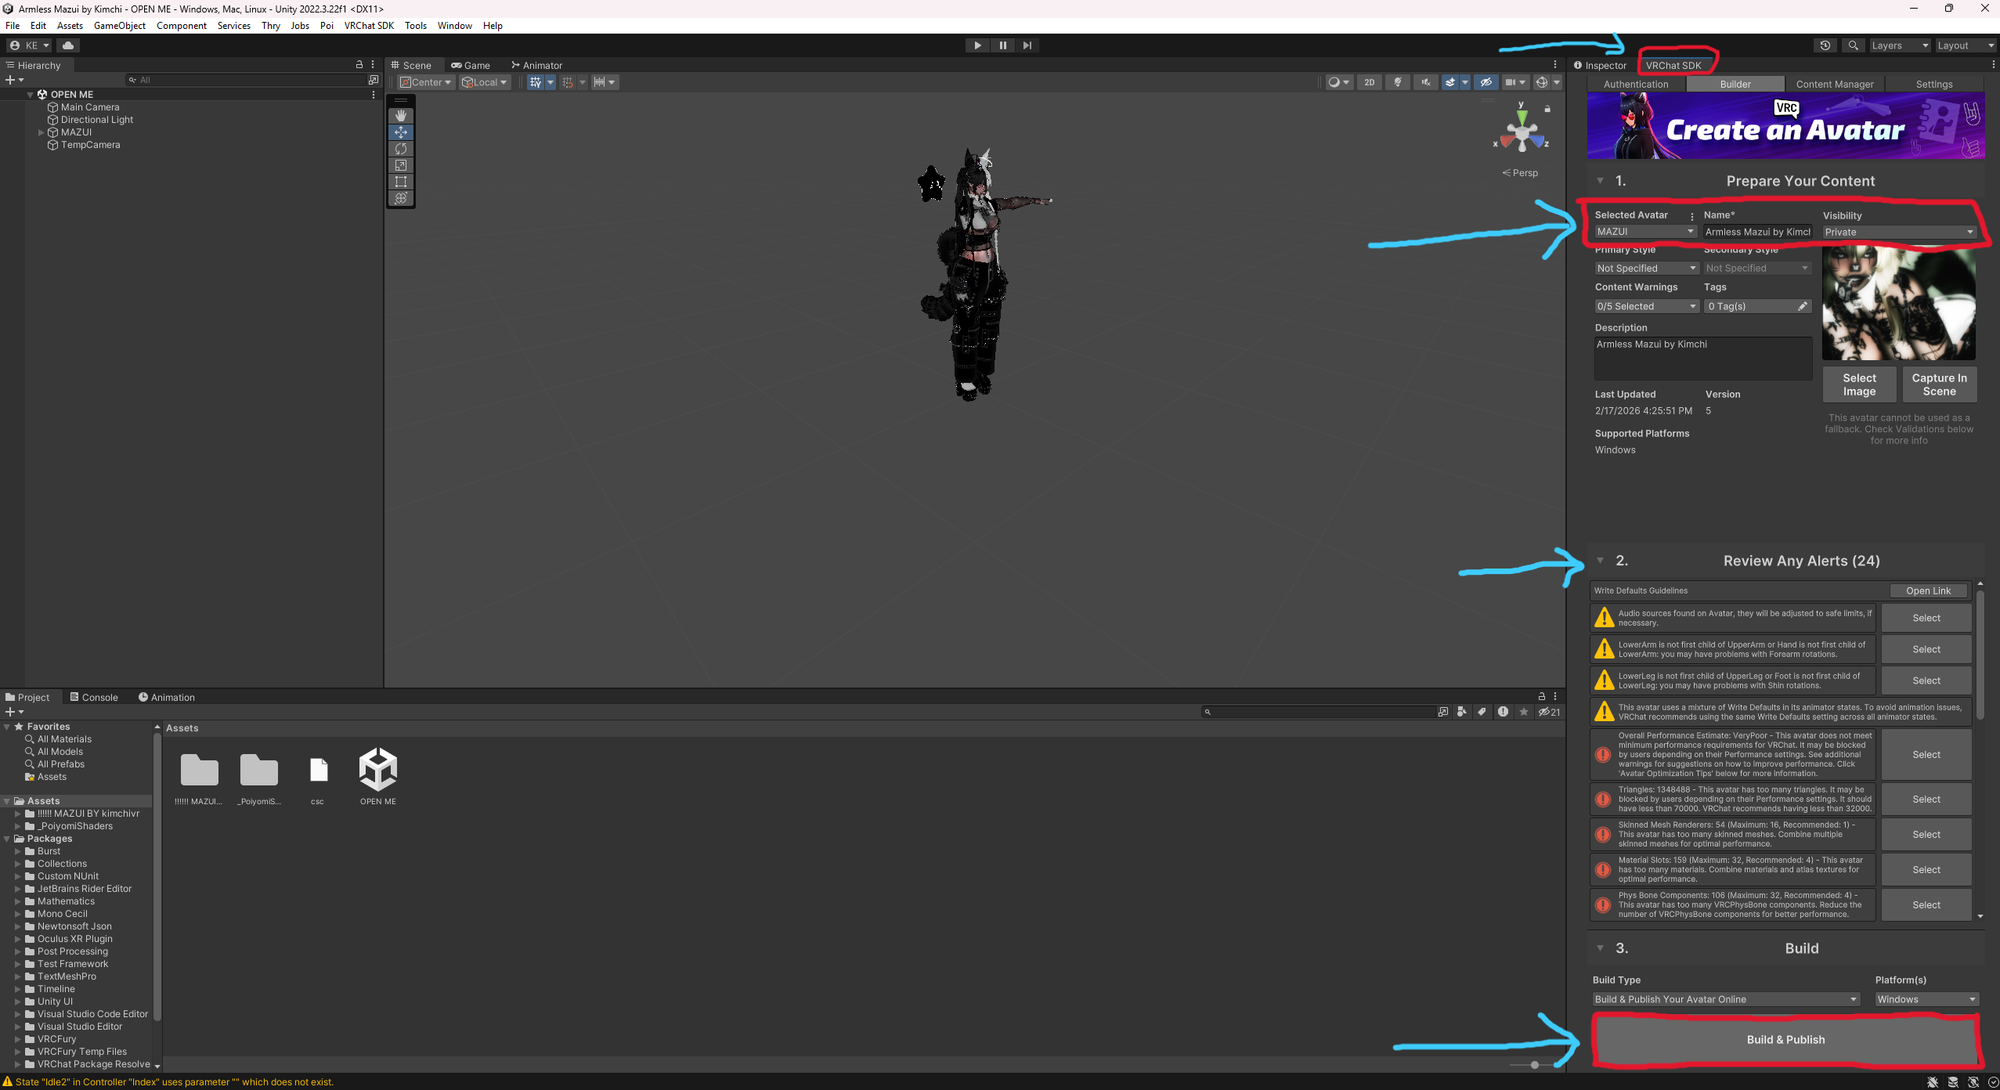
- In the VRChat SDK panel, click the Builder tab.
- Make sure your avatar is selected in the Hierarchy.
- Fill in your avatar's name and description.
- Set visibility to Private. Public avatars can be cloned by other users. Always upload private to protect yours and others work.
- Add a thumbnail by clicking Select Image or Capture In Scene. I usually just take one of the pictures from the avatars store page and screenshot it, but some creators include a thumbnail.
- In Section 2, review your alerts. Click Fix on any that have a Fix button directly in the Builder. These are safe SDK-level fixes and are different from the autofix popups that appear after you hit Build and Publish.
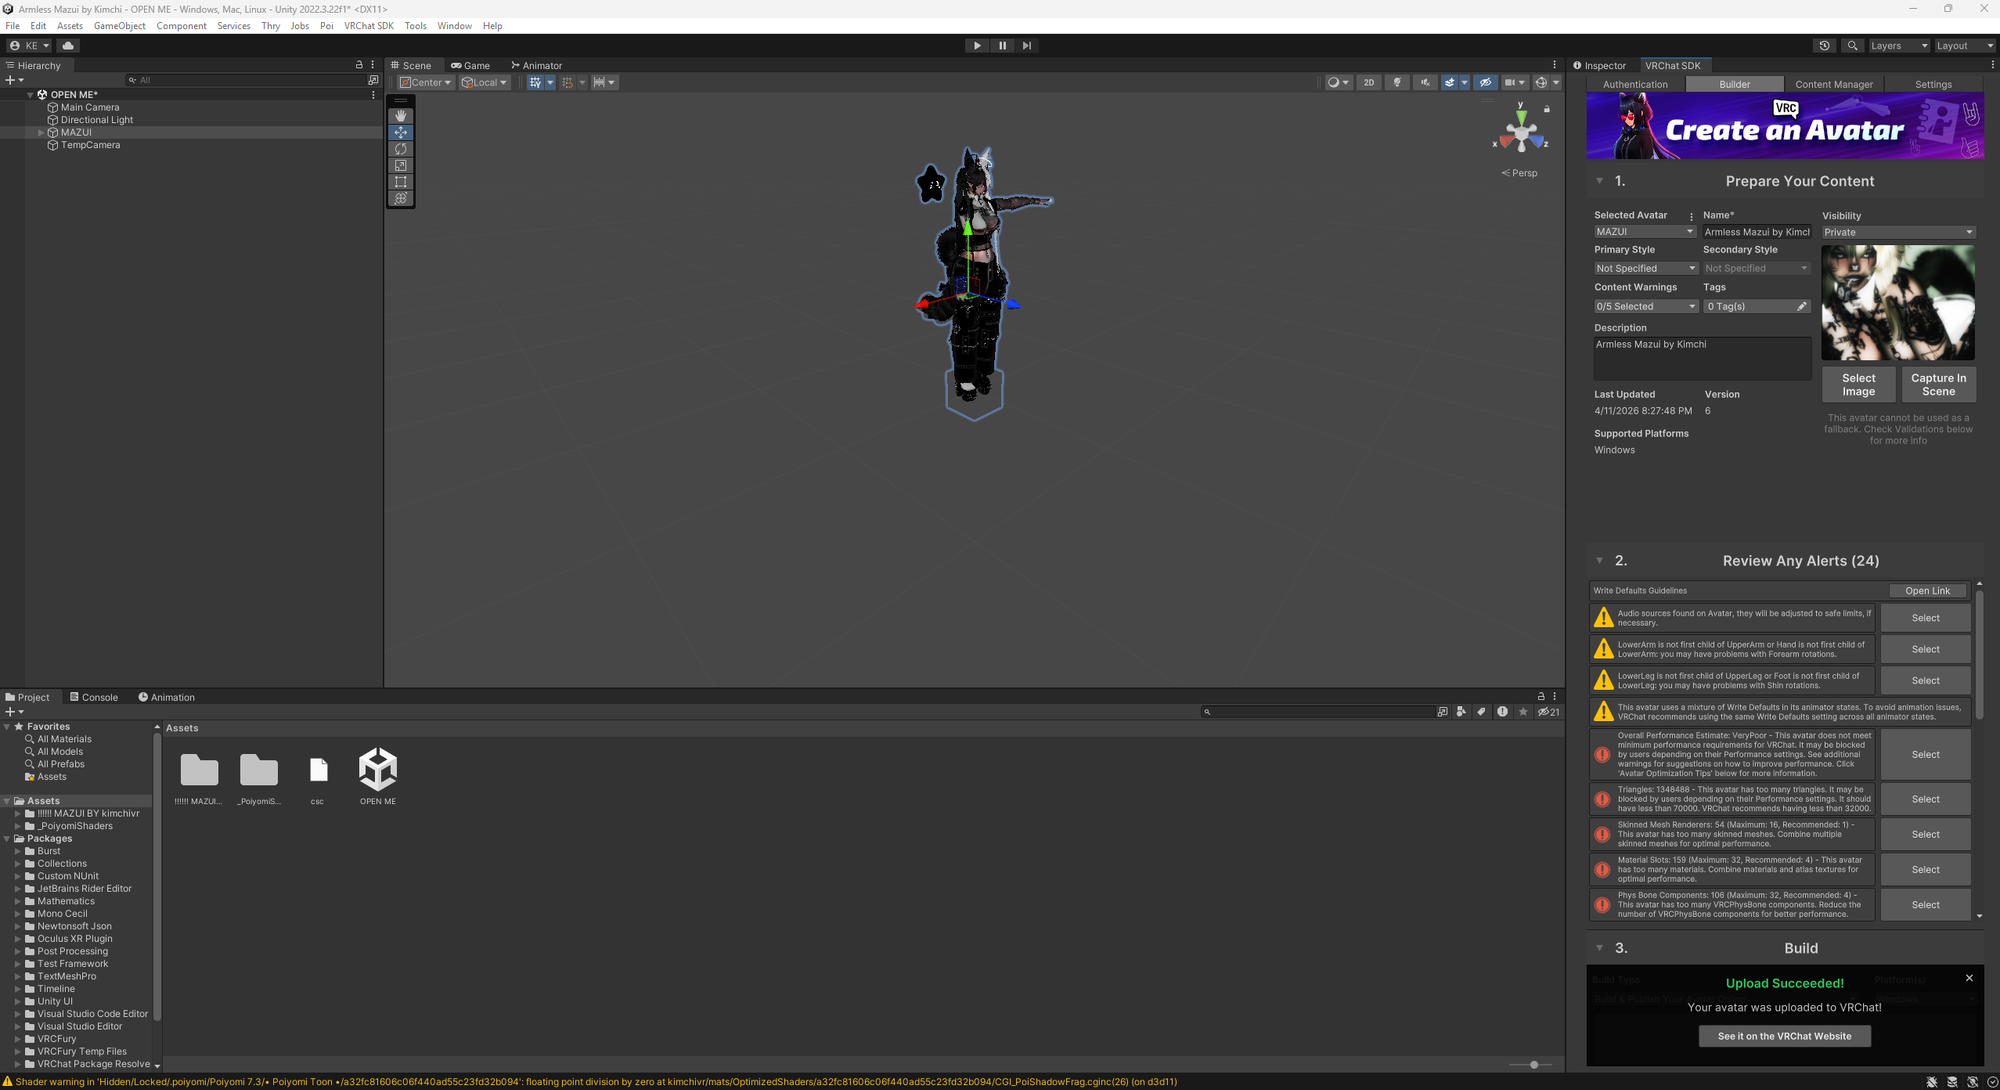
- Hit Build and Publish.
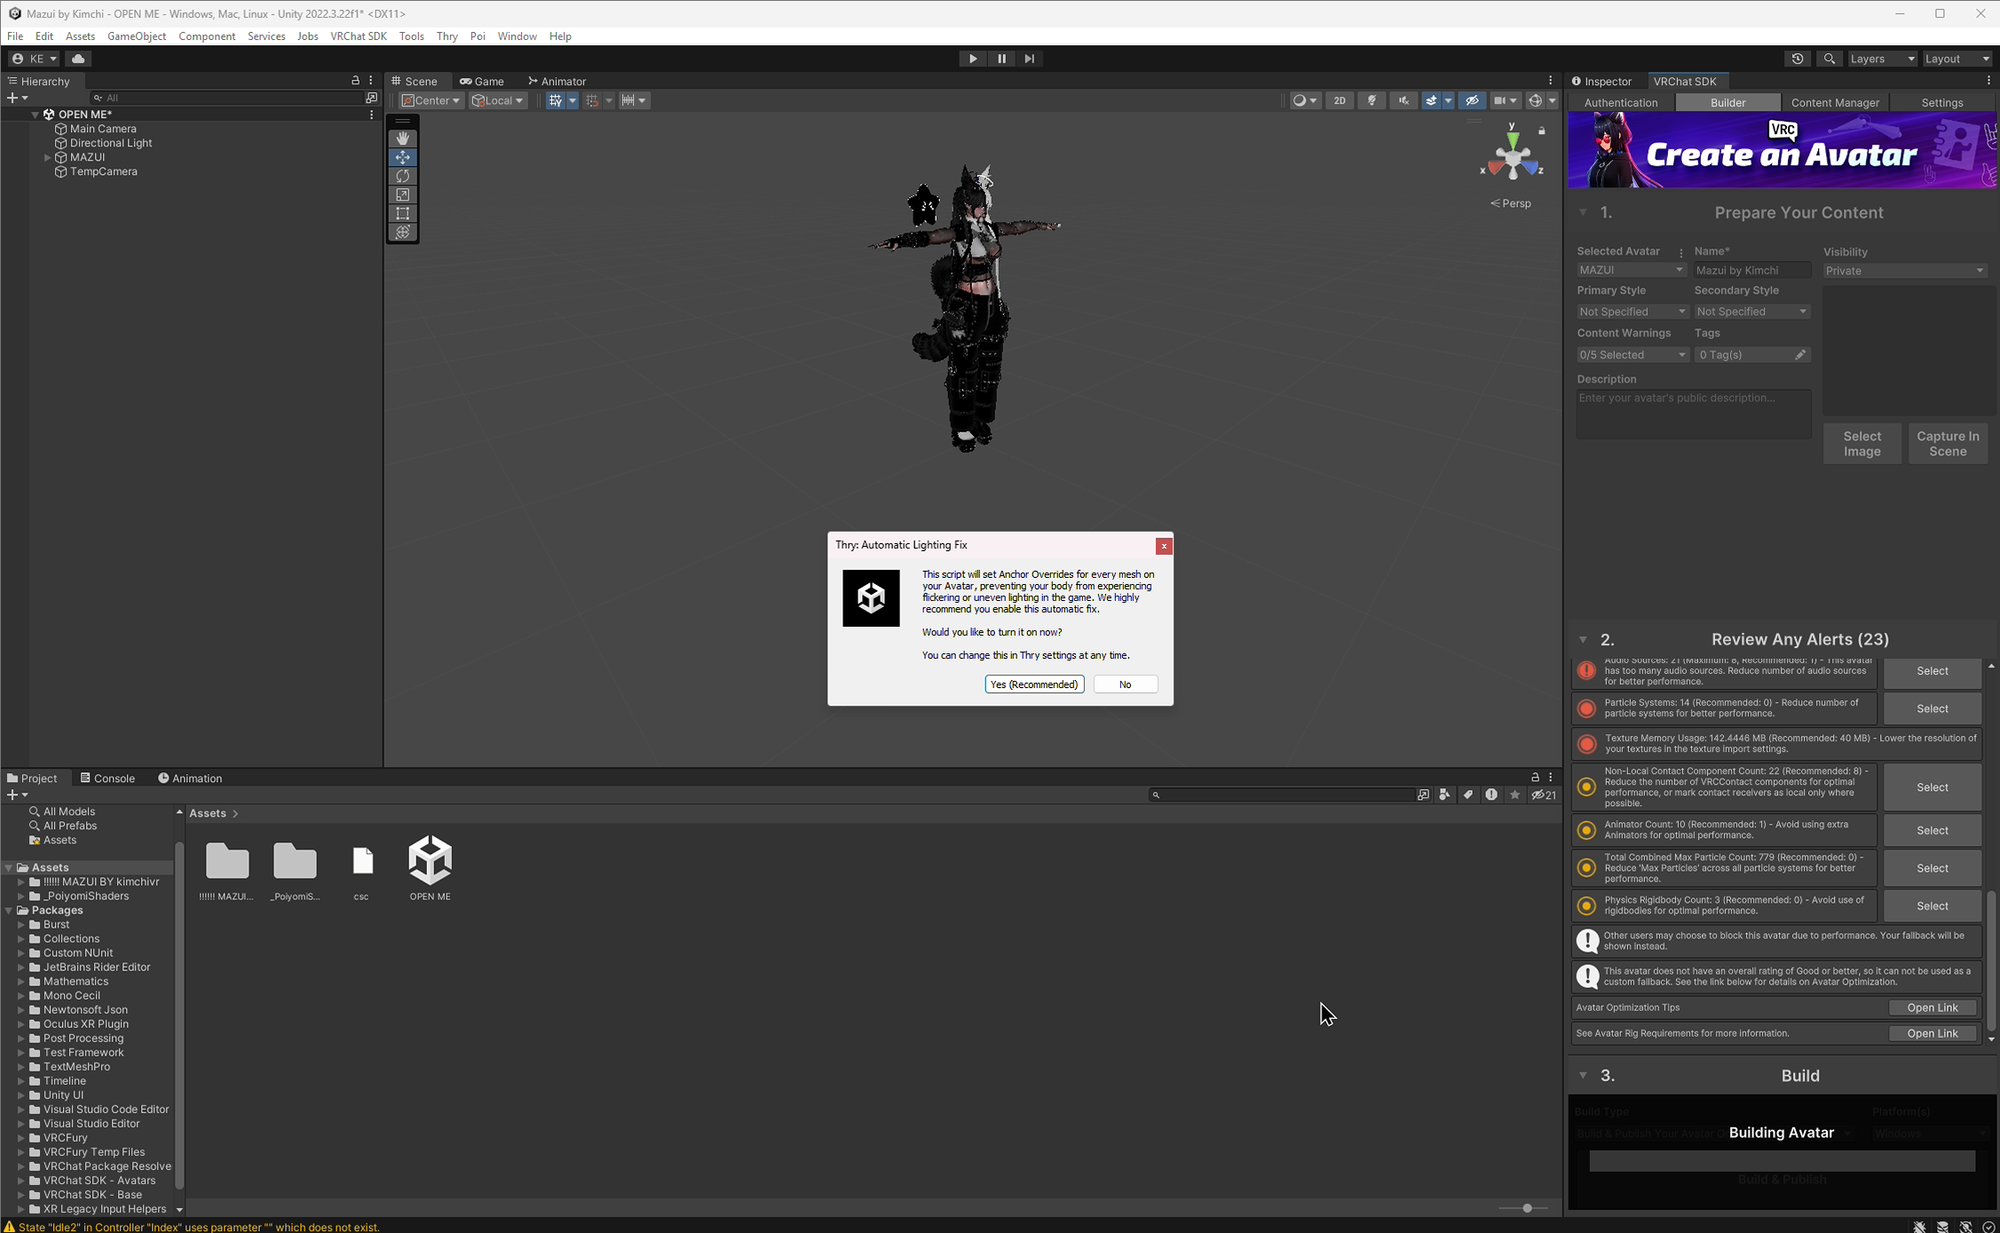
After you click Build and Publish, Unity may pop up with autofix windows from tools like Thry's RGB Packer or other packages you have installed. These are different from the Builder alerts above. Be cautious with these popups. They can make changes to your materials and textures that are hard to undo and break your project. When in doubt, click no or cancel. You can always research it later or ask in the Discord for guidance, but as a rule of thumb I always skip auto fixes until I get my avatar in game and verified that somethings wrong first.
AUTO FIX BAD (mostly)! >_<
Once the upload is done, open VRChat, go to your Avatar menu, and find it under My Avatars. It should be there within a few minutes.
Common Problems and Fixes
VCC won't connect or shows an error: add Unity and VCC to your Windows Defender exclusions. Go to Windows Security > Virus and threat protection > Exclusions and add both application folders.
Avatar is all pink: your shaders aren't installed. Import Poiyomi Toon or lilToon as a .unitypackage before importing your avatar.
SDK panel shows errors: read each error carefully. Most are missing components or unassigned fields. Fix them top to bottom.
What's Next
Your avatar is live. Go explore, find some worlds, and enjoy it. ♡
Most avatars come with toggles already set up by the creator, so you should be good to go as-is. When you're ready to go deeper, my upcoming guides cover things like adding your own toggles, setting up GoGoLoco if it wasn't included, and optimizing for performance.
If you have questions or need help, come find me in the Discord.